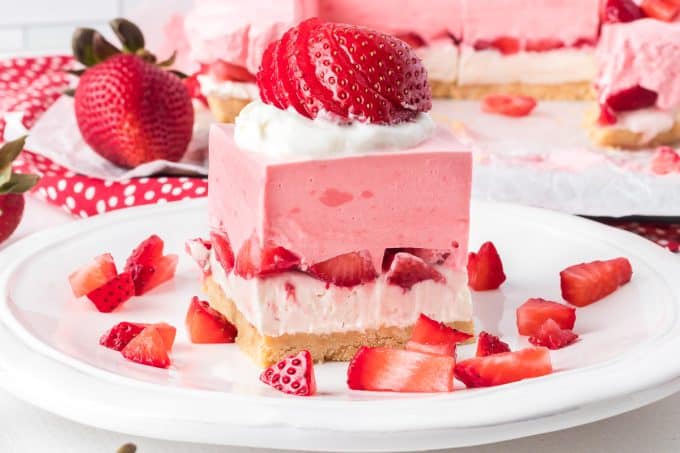
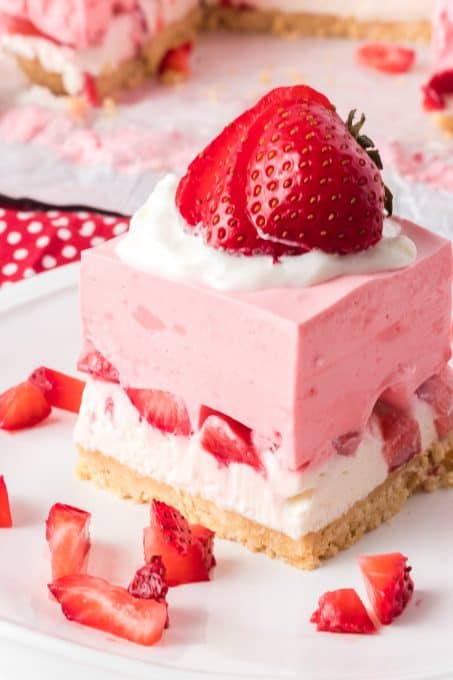
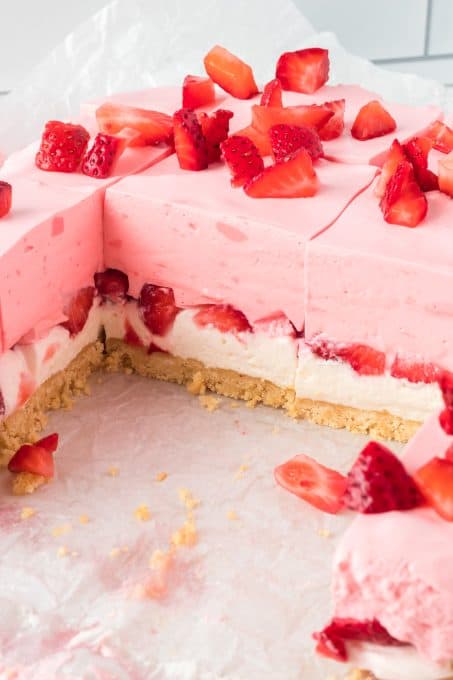
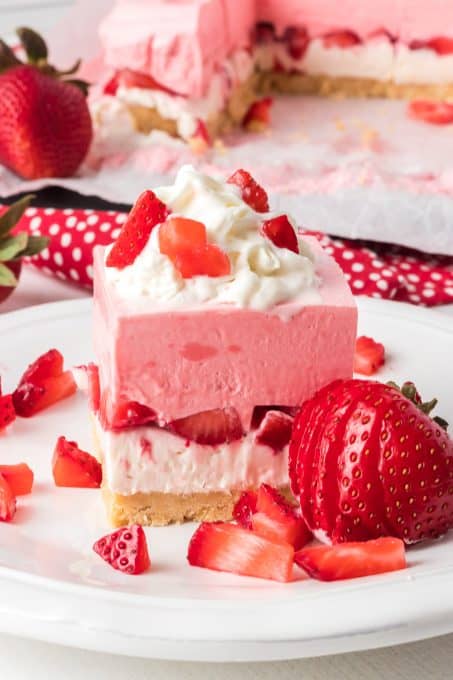
These Strawberry Cream Dream Bars are the perfect summer dessert to help you cool off in the heat! With a crunchy cookie crust, a creamy cheesecake layer, and a sweet strawberry gelatin layer, these dream bars are a good idea any time of year!
It’s strawberry season, and I have the perfect way for you to use them! These creamy dessert bars topped with juicy strawberries have just the right amount of sweetness and are so refreshing. I love to make a batch of these easy dessert bars any time I have guests. They don’t just taste great; they look beautiful as well!
They are easy to make, look impressive, and are delicious to boot! The hardest part is waiting for each layer to set up—but I promise it’s worth the wait!
SAVE THIS RECIPE FOR NO-BAKE STRAWBERRY DREAM BARS TO YOUR FAVORITE PINTEREST BOARD!
All the Dream Bars
It’s been a minute since I posted a Dream Bar recipe, but if you’ve been around here for a while, you know these are kind of my thing! Also known as “lush” or “dessert lasagna”, each of these decadent desserts is made with a cookie or graham cracker crust, followed by a cream or cheesecake layer, a gelatin or pudding layer, and a whipped topping with fruit or crushed cookies as a garnish! Check out all the different flavors of Dream Bar Recipes and find your favorite one!
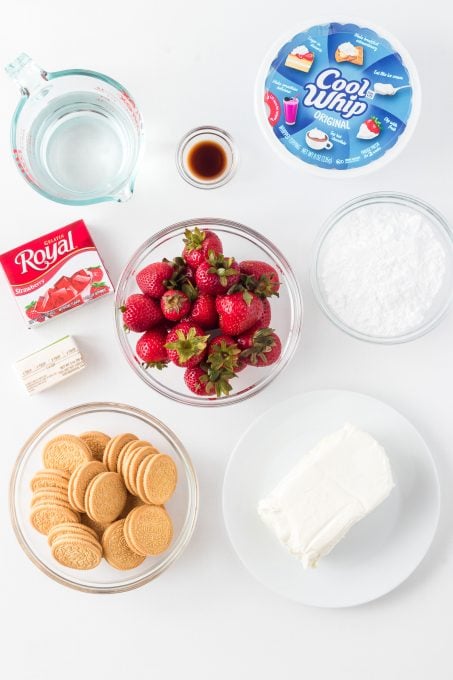
Ingredients for Strawberry Cream Dream Bars
Let’s go over what you’ll need for each individual layer:
Cookie Crust Ingredients
Golden Oreos
Butter
Creamy Strawberry Layer
Strawberry gelatin
Boiling water
Cold water
Cream cheese, room temperature
Red food color (optional)
Cool Whip or stabilized whipped cream
Cheesecake Layer
Cream cheese, room temperature
Powdered sugar
Pure vanilla extract
Cool whip or stabilized whipped cream
You’ll need additional whipped cream and may need more fresh strawberries for the tops of the strawberry bars if you’d like to garnish them.
Please review the recipe card below for the exact amounts of each ingredient!
How to Make No-Bake Strawberry Dessert Bars
These strawberry cream bars have several layers, so we’ll break down the steps for each one.
First, line your 8 X 8-inch baking pan with parchment paper. This way, you can easily remove the entire tray of bars, peel down the sides, slice them, and neatly serve them. Also, it makes for minimal cleanup.
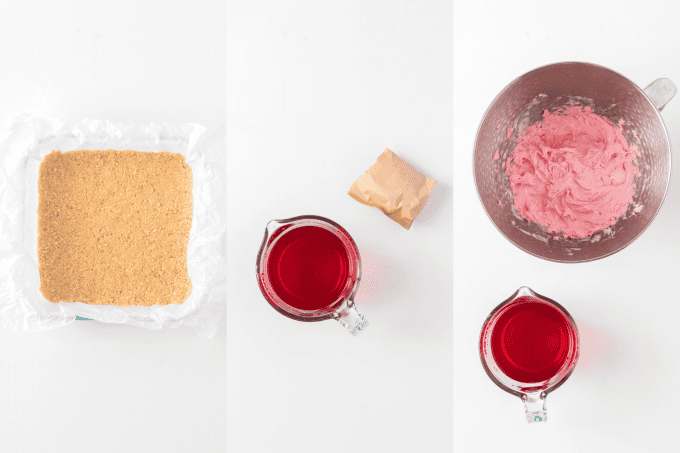
Cookie Crust
In a medium microwave-safe bowl, melt the 4 tablespoons of butter in a microwave for about 30 seconds. Stir and melt for another 5-10 seconds, if necessary.
In the bowl of a food processor, pulse the Golden Oreos (with the filling!) until they are fine crumbs. If you don’t have a food processor, put the cookies in a plastic bag and use a rolling pin to crush them. Add the cookie crumbs to the melted butter and mix with a rubber spatula until all is well incorporated.
Pour into the prepared baking pan and spread, pressing down to create an even crust. Place the pan into the freezer while preparing the rest of the recipe, for a minimum of 30 minutes.
Make the Strawberry Gelatin
When mixing the strawberry gelatin, ONLY use the amount of water stated in THIS recipe, NOT as is called for on the box. We want the mixture to be a bit more stable than usual.
In a medium bowl, mix the gelatin with ¾ cup boiling water and stir until dissolved. Add the ¾ cup cold water and stir.
Chill the gelatin until it is cold, about 10 minutes. You do not want it to set. If it does set, it won’t blend as smoothly with the cream cheese and you’ll have pink chunks of gelatin throughout the dessert. It will still be delicious, it just won’t resemble the pictures.
Strawberry Cream Layer
In a large bowl, beat 8 ounces of the cream cheese with the red food coloring on medium speed.
Slowly pour in the chilled gelatin mix while mixing everything together. Once it’s completely smooth, place it into the refrigerator to chill and thicken for one hour.
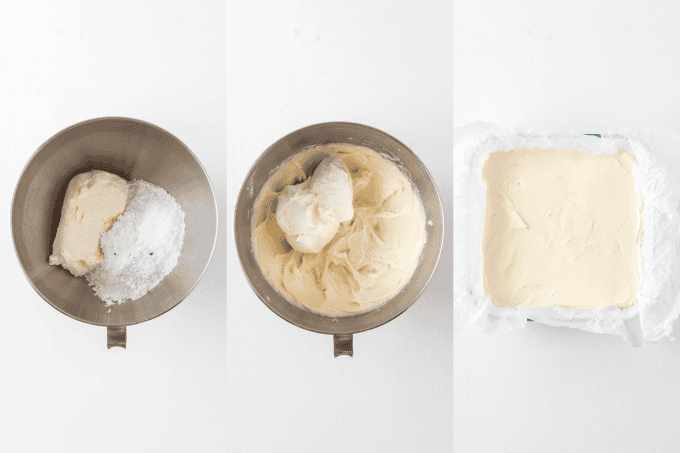
Cream Cheese Filling
In a mixing bowl, beat another 8 ounces of cream cheese, confectioners’ sugar, and vanilla together with an electric mixer until smooth and creamy. With a rubber spatula, fold in one cup of the Cool Whip.
Place dollops of the cream cheese mixture onto the frozen cookie crust and with an offset spatula, spread to form an even layer.
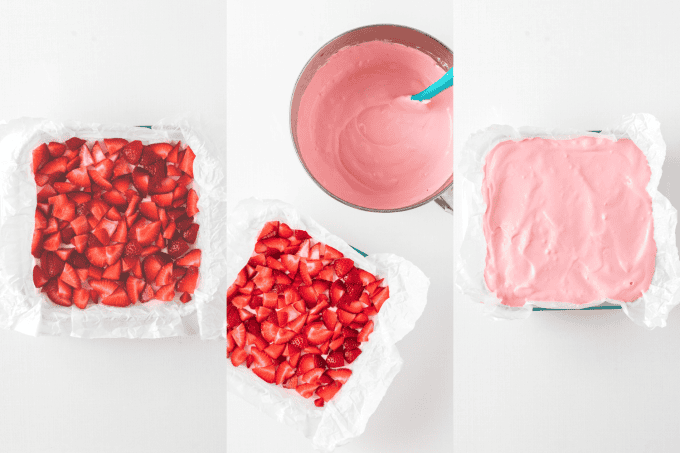
Slice or chop half of the fresh strawberries and evenly spread them over the cheesecake in a single layer. Reserve the other half to serve and decorate each slice.
If you prefer not to use Cool Whip, make my Stabilized Whipped Cream. It makes the perfect amount of whipped cream you’ll need for each of my Dream Bar recipes and tastes much better, too!
Strawberry Cream Layer- continued
After the Strawberry Cream mixture has been refrigerated for an hour, fold in the remaining Cool Whip (about 2 cups) with a rubber spatula, combining until evenly distributed and smooth.
Gently pour the strawberry cream onto the cheesecake layer and spread evenly with an offset spatula.
Place into the refrigerator overnight or for a minimum of 6 hours. I like the overnight option because not only does it help me with time by making dessert ahead of time, but it slices better for a pretty presentation too!
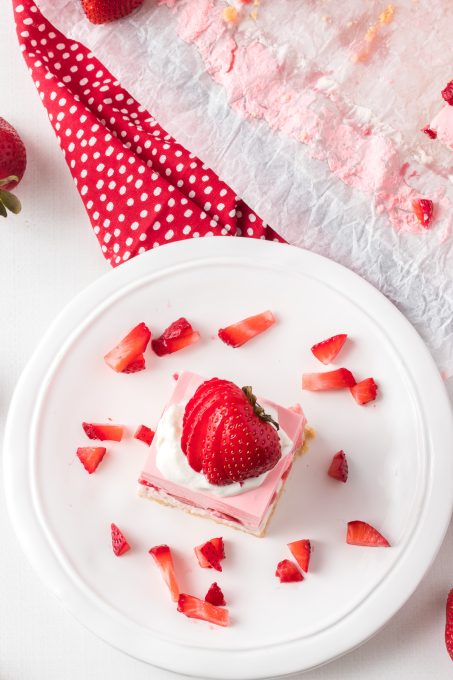
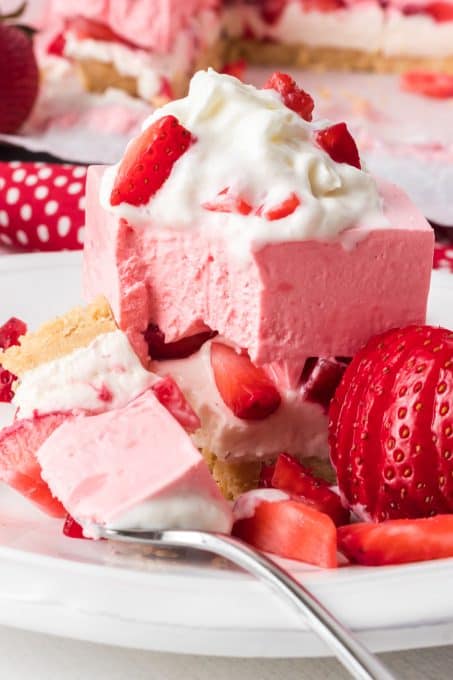
Serving Suggestions for Strawberry Dream Dessert Bars
When slicing, remove the bars from the entire pan by lifting them out in the parchment. Run a large knife under hot water, dry off, and then slice through the bars, repeating with each cut. This will help make clean cuts.
Serve with dollops of additional Cool Whip, 3 Ingredient Whipped Cream, or Stabilized Whipped Cream and fresh strawberries.
How to Store Leftover Strawberry Cream Dessert Bars
These dream bars should be covered and stored in the refrigerator. They will be good for about 3-4 days. You can also store individual servings in an airtight container in the fridge.
Can I double the recipe to feed a crowd?
Yes, you can double the recipe and use a 13 x9-inch pan to make a larger batch.
More No-Bake Dessert Recipes
If you want some new recipes for no-bake desserts (besides my Dream Bars), try one of these recipes next time:
Keep an eye out for more of my easy recipes each week!
Print
Strawberry Cream Dream Bars
Strawberry Cream Dream Bars are a perfect summer treat to help you cool off! With a cookie crust, cheesecake layer, and creamy strawberry layer, this no bake dessert is a good idea any time of year!
Course Dessert
Cuisine American
Keyword Strawberry Cream Dream Bars
Prep Time 30 minutesminutes
Refrigeration 6 hourshours30 minutesminutes
Total Time 7 hourshours
Servings 9people
Calories 530kcal
Author Lynne Feifer
Ingredients
8ouncesCool Whip or 1 recipe of my Stabilized Whipped Creamdivided
16ouncesfresh strawberriesAll of them rinsed with half hulled and sliced, and the other half reserved for serving and decorating.
Golden Oreo Crust
20Golden Oreo Cookieswith filling
4tablespoonsbutter
Strawberry Cream Layer
3ouncesstrawberry gelatin
¾cupboiling water
¾cup cold water
8 ouncescream cheeseroom temperature
8 dropsred food coloringif desired
2 cupsCool Whip
Cheesecake Layer
8ouncescream cheeseroom temperature
1cuppowdered sugar
1teaspoonpure vanilla extract
1 cupCool Whip
additional Cool Whip, my Stabilized Whipped Cream or can whipped cream for servingif desired
Instructions
Golden Oreo Crust
Line an 8 X 8-inch baking pan with parchment, so that you can easily remove the bars to evenly slice and serve.
In a medium bowl, melt the 4 tablespoons of butter in a microwave for about 30 seconds. Stir and melt for another 5-10 seconds, if necessary.
In a food processor, pulse the Golden Oreos (with filling!) until they are fine crumbs. Add the cookie crumbs to the melted butter and mix with a rubber spatula until all is well incorporated.
Pour into the prepared baking pan and spread, pressing down to create an even crust. Place pan into the freezer while preparing the rest of the recipe, a minimum of 30 minutes.
Strawberry Gelatin
Into a 2-cup measuring glass, mix the strawberry gelatin with 3/4 cup boiling water. Stir until dissolved. Add the 3/4 cup cold water and stir. Place into refrigerator until completely cooled, but not set – about 10 minutes.
Strawberry Cream Layer
In a mixing bowl, beat 8 ounces of the cream cheese with the red food coloring.
Slowly pour in the chilled gelatin mix while mixing everything together. Once completely smooth, place into refrigerator to chill and thicken for one hour. *See Note.
Cheesecake Layer
In a mixing bowl, beat the second 8 ounces of cream cheese, confectioners' sugar, and vanilla together until smooth and creamy. With a rubber spatula, fold in one cup of the Cool Whip.
Place dollops of cheesecake mixture onto the frozen crust and with an offset spatula, spread to form an even layer.
Slice or chop half of the fresh strawberries and evenly spread them over the cheesecake in a single layer. Reserve the other half for serving and decorating each slice.
Strawberry Cream Layer – continued
After the Strawberry Cream mixture has been refrigerated for an hour, fold in the remaining Cool Whip (about 2 cups) with a rubber spatula, combining until evenly distributed and smooth.
Gently pour the strawberry cream onto the cheesecake layer and spread evenly with an offset spatula.
Place into the refrigerator overnight or for a minimum of 6 hours
When slicing, remove the bars from the entire pan by lifting them out in the parchment. Run a large knife under hot water, dry off, and then slice through the bars, repeating with each cut. This will help make clean cuts.
Serve with dollops of additional Cool Whip of my Stabilized Whipped Cream and fresh strawberries.
Notes
Use the amounts of water in this recipe required to mix the strawberry gelatin. DO NOT use the amounts listed in the box instructions. We want a more stable gelatin and less of it.
If strawberry cream mixture is left in the refrigerator for more than one hour, the gelatin will harden and form. This isn’t an issue unless you want a completely creamy layer for the top with NO strawberry or red gelatin specks.