Once upon a time, I auditioned for one of those reality food shows, and my kimchi spring rolls got me to the next level of auditions (If you haven’t tried them yet, I posted a budget-friendly version here on the blog!) Why would a recipe like that get me flown to Los Angeles, you ask? Well, the judge asked me how I made my kimchi, and apparently, I aced his test; it’s not simply pickled; it’s fermented! I’ve always loved fermented foods, and this Homemade Kimchi is easy, vegan, budget-friendly perfection—the longer it sits, the better it gets! However, the process is super important, so let’s dive in!
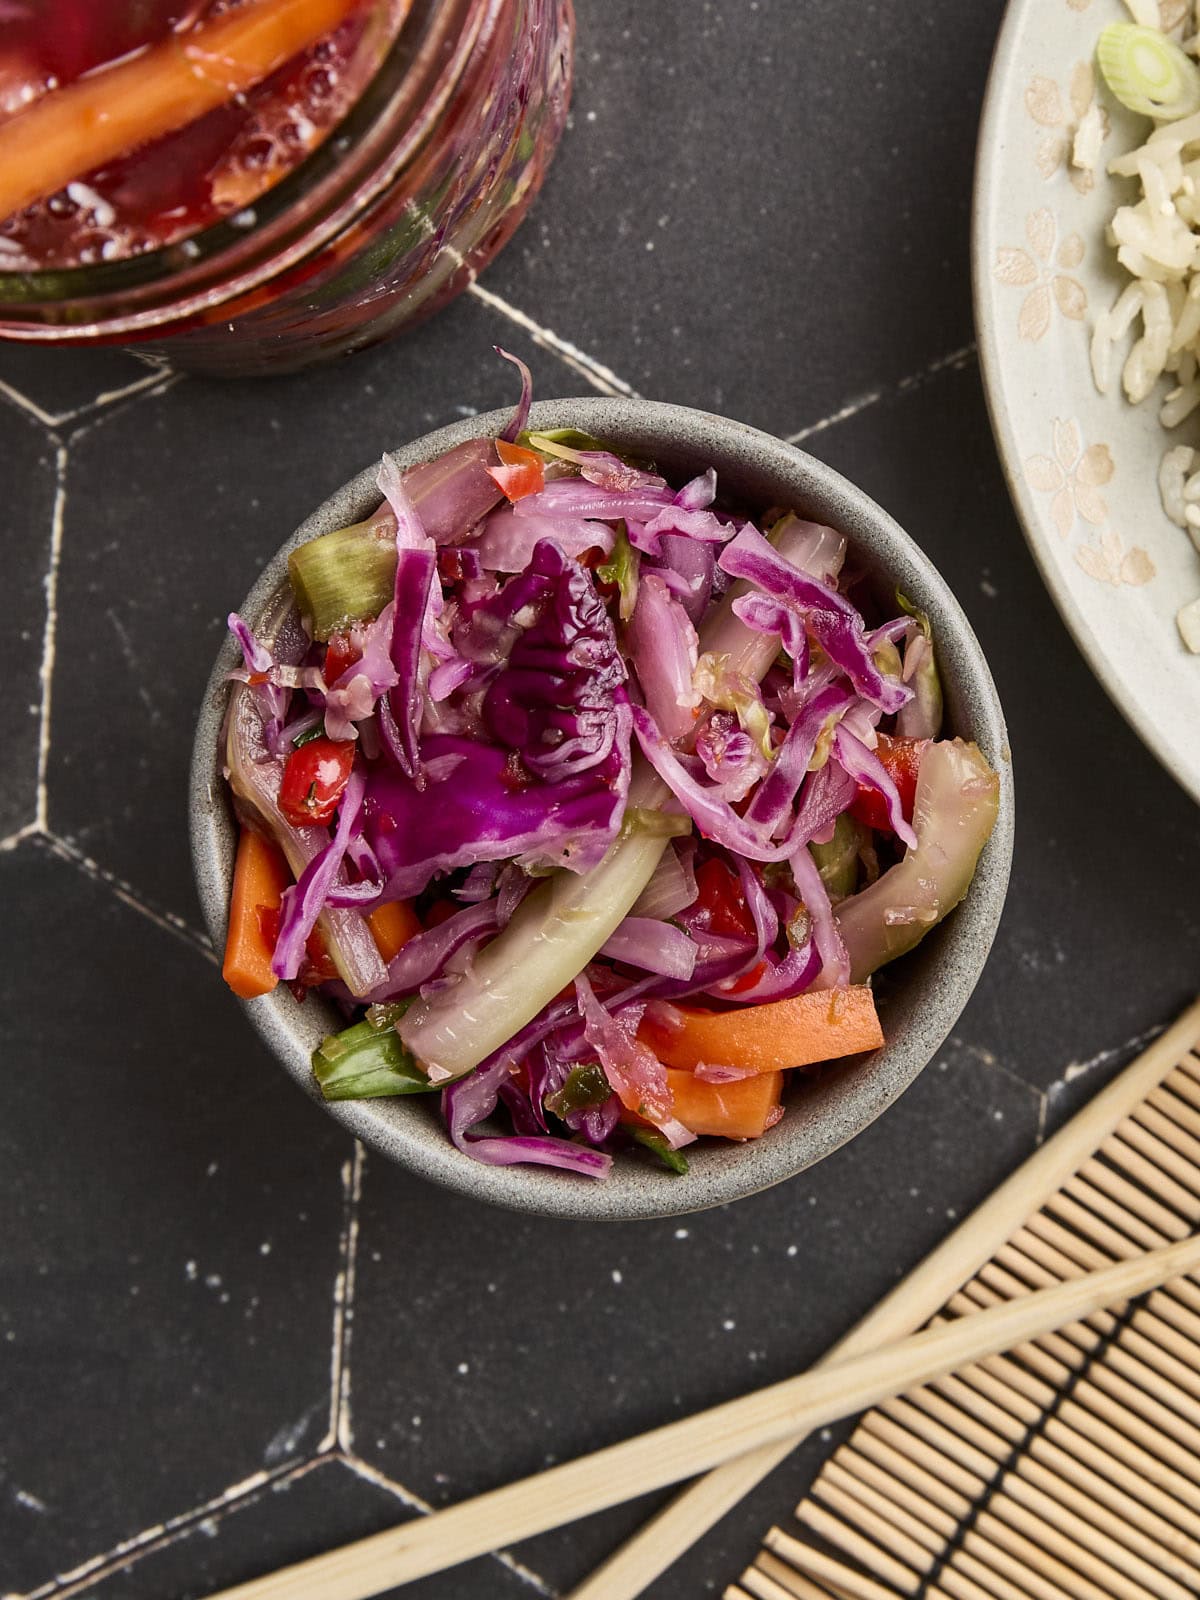
Kimchi is a spicy, tangy, and veggie-packed Korean side dish made by fermenting fresh vegetables (think of it like pickles with a probiotic boost!). Instead of vinegar, the magic happens through lacto-fermentation, where good bacteria (the kind that’s great for your gut) naturally preserve the veggies and build the signature sour-savory flavor. I love serving it on rice bowls, tucked into wraps, or eaten straight from the jar as a quick snack. 😋
When I was in my 20s, I took a holistic nutrition course with a Naturopath Doctor in Indonesia. On my sojourn, I had a very long layover in South Korea, where I swear I ate 100 different kinds of kimchi. It helped me pinpoint the veggies I love most in my homemade recipe, but you can use just about any hardy vegetable you have on hand; I like to do a seasonal version as well, using raw pumpkin or butternut squash in the fall. Veggies like cucumbers and zucchini can be used, but because of their super high water content, they turn too mushy for my liking. Cabbage truly helps the texture no matter what else you add, so be sure to pick out a nice fresh head of cabbage!

See how we calculate recipe costs here.
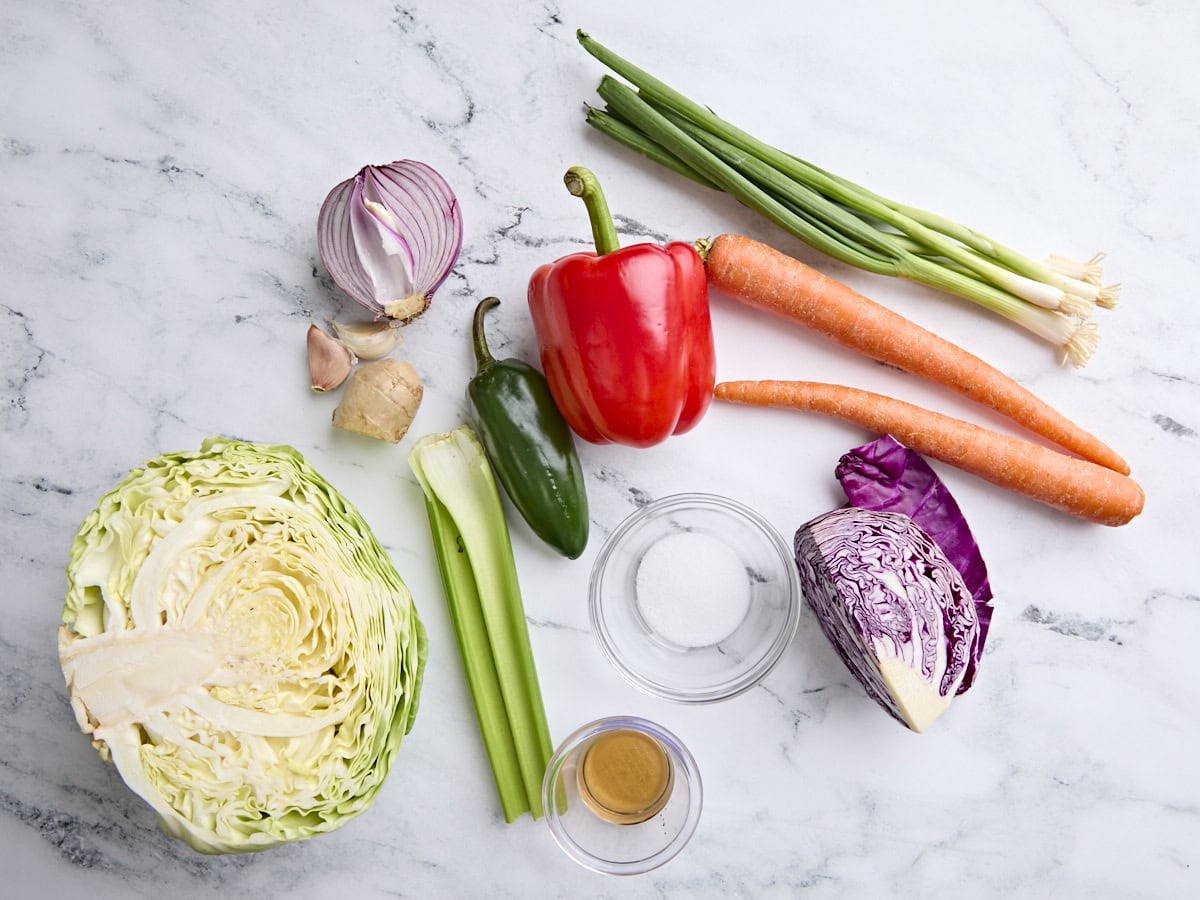
Gather all of your ingredients. Before starting, completely sanitize your workspace and run three 12 oz canning jars through your dishwasher on high heat to sanitize them. Or, you can alternatively sanitize your jars by submerging them in boiling water and then allowing them to air dry. I’ve also shared more on this below the step-by-step photos for reference.
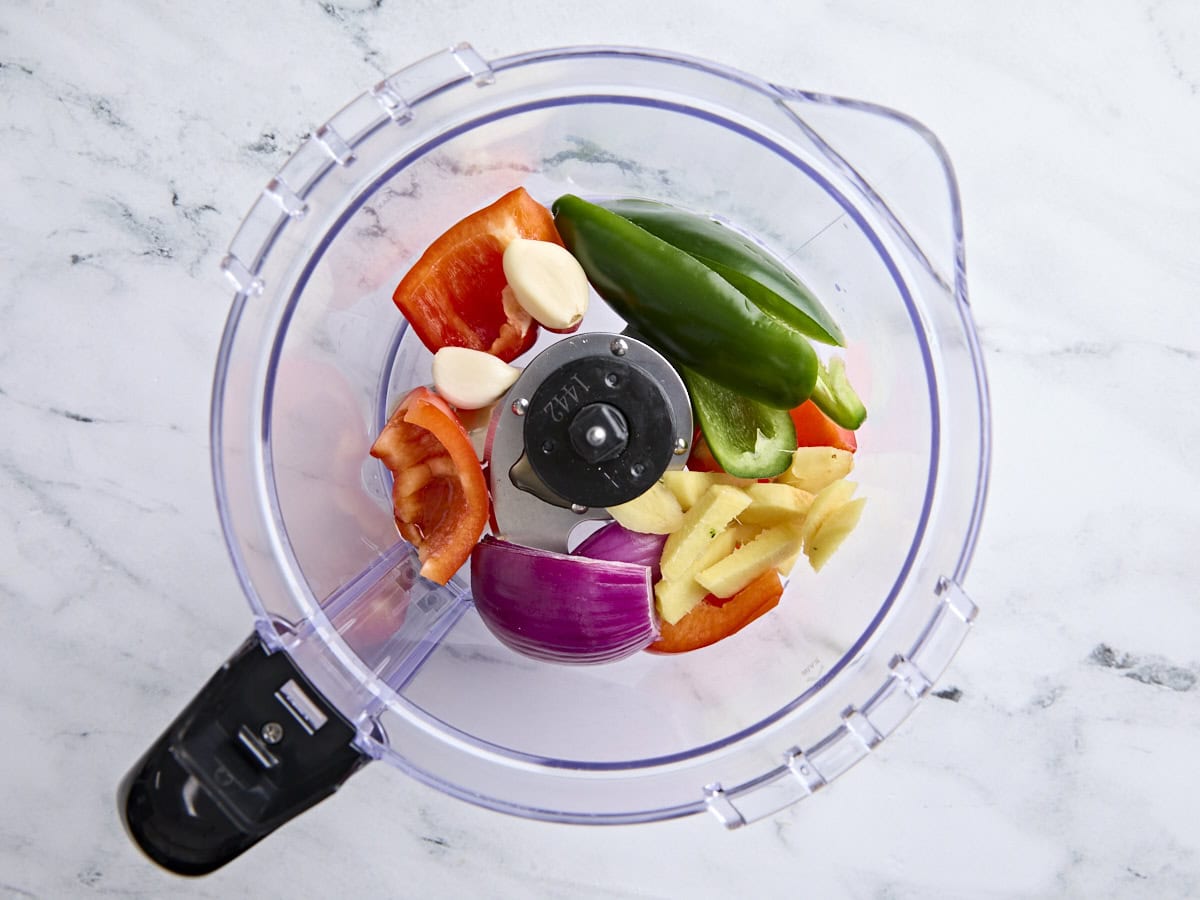
Prep the veggies: While you wait for your jars to sanitize, you can get started on the vegetables. Add 1 Tbsp agave syrup, 1 jalapeno (seeded), ½ red bell pepper (seeded), ¼ red onion, 2 inch peeled fresh ginger, and 2 large garlic cloves to a food processor.
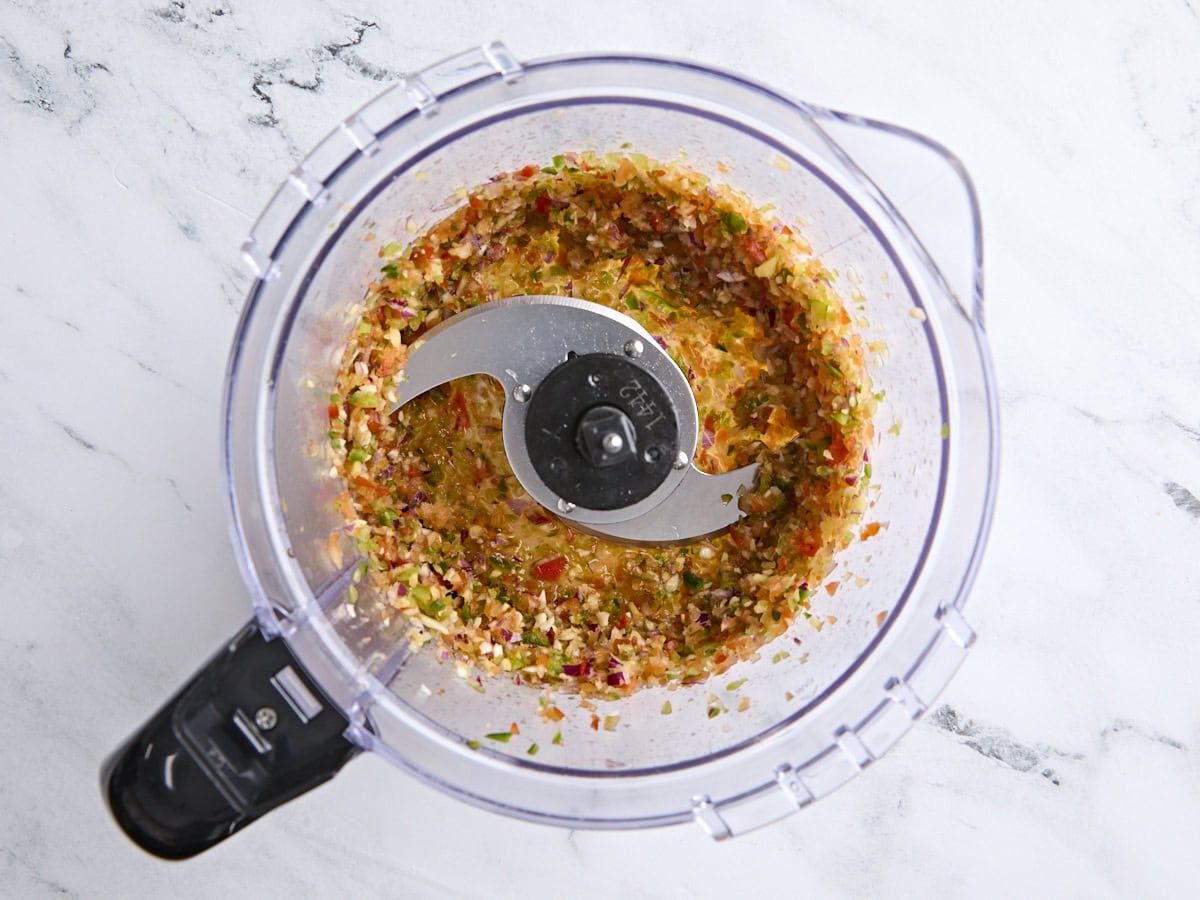
Pulse them in the food processor until all the veggies break down into a paste-like consistency. Any visible veggies should roughly be all the same size, minced. Set this mixture to one side for now.

Now roughly chop or slice ½ green cabbage and ¼ red cabbage, roughly chop 4 green onions (discarding only the very tip of the root), dice 2 ribs celery, julienne (thinly slice) 2 carrots, remaining ½ red bell pepper, and remaining ¼ red onion. You can also chop up everything coarsely if desired (this recipe is very forgiving!)
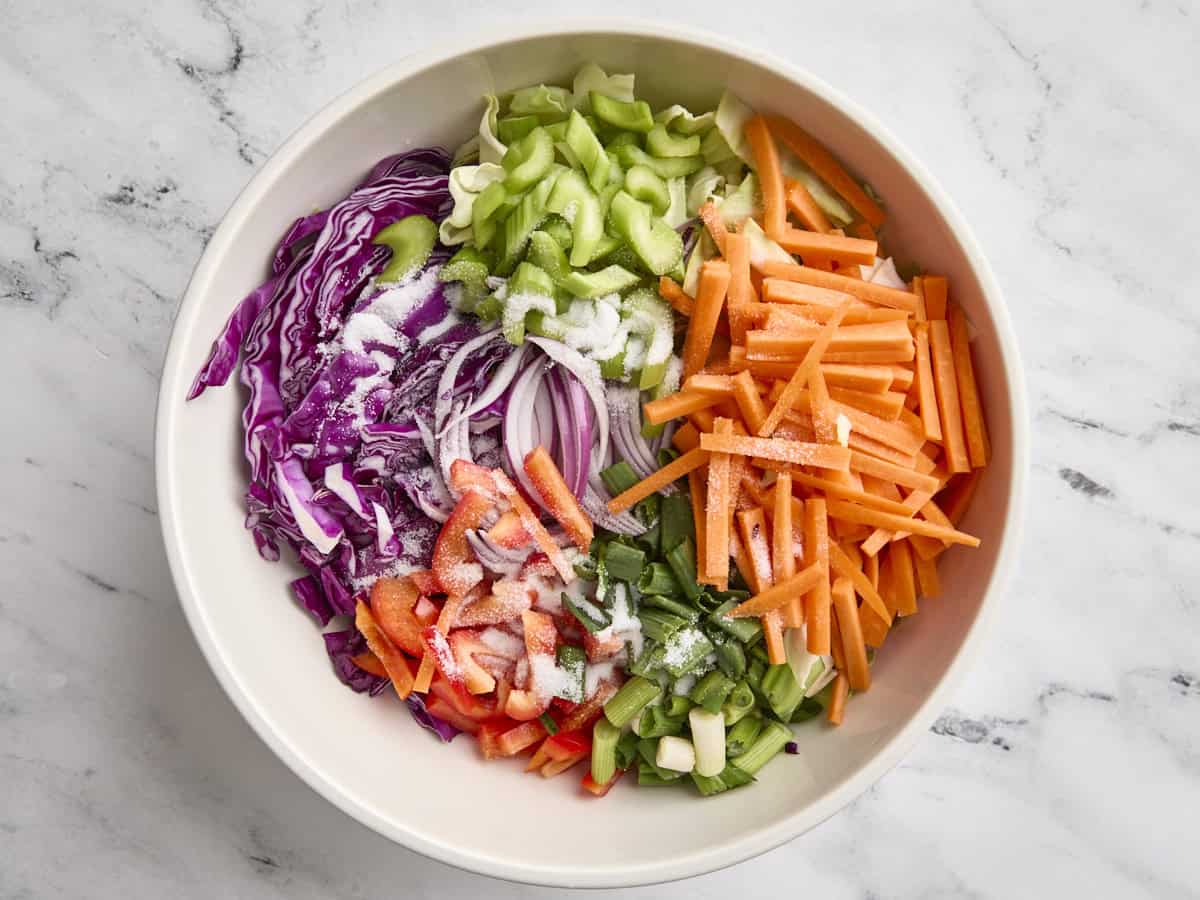
Massage the vegetables: Add the prepped vegetables to a large mixing bowl and sprinkle with 1 Tbsp salt. With clean hands, massage the salt into the vegetables until they are all very soft (about 10 minutes).

After at least 10 minutes of massaging, add the processed vegetables and agave mixture from your food processor to the bowl.
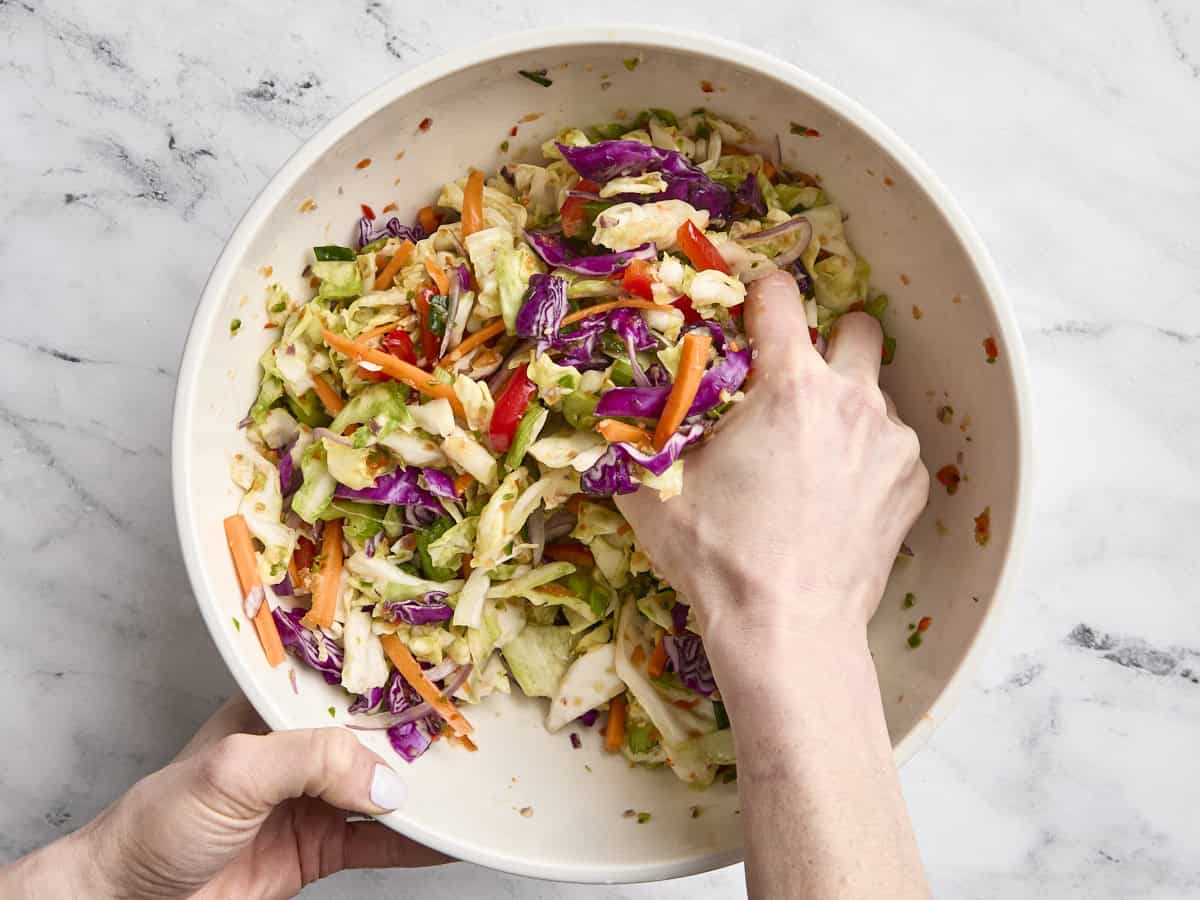
Massage the vegetables with the spicy-sweet processed mixture for a further 5-10 minutes or until a significant amount of water has been released from the veggies.
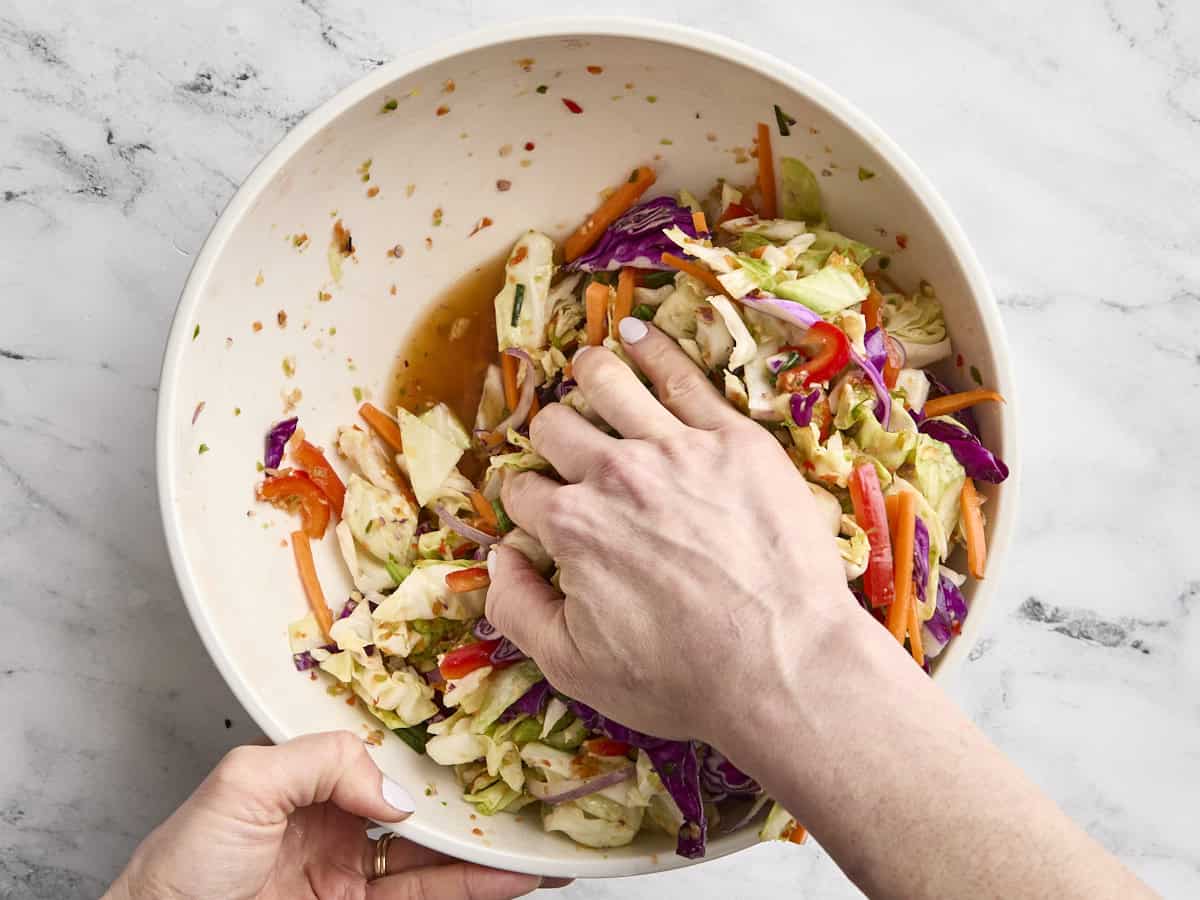
You should see it pooling at the bottom of your bowl, as shown in the photo above.
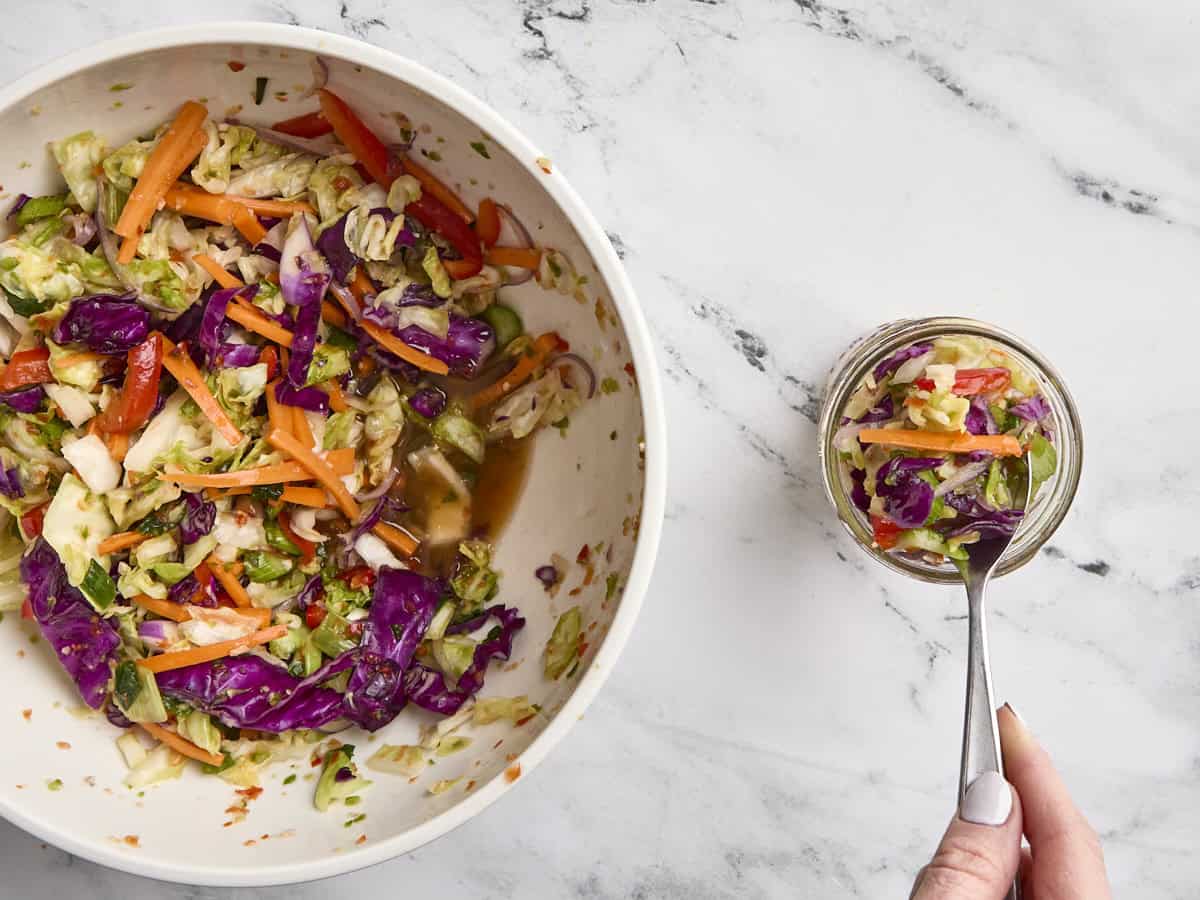
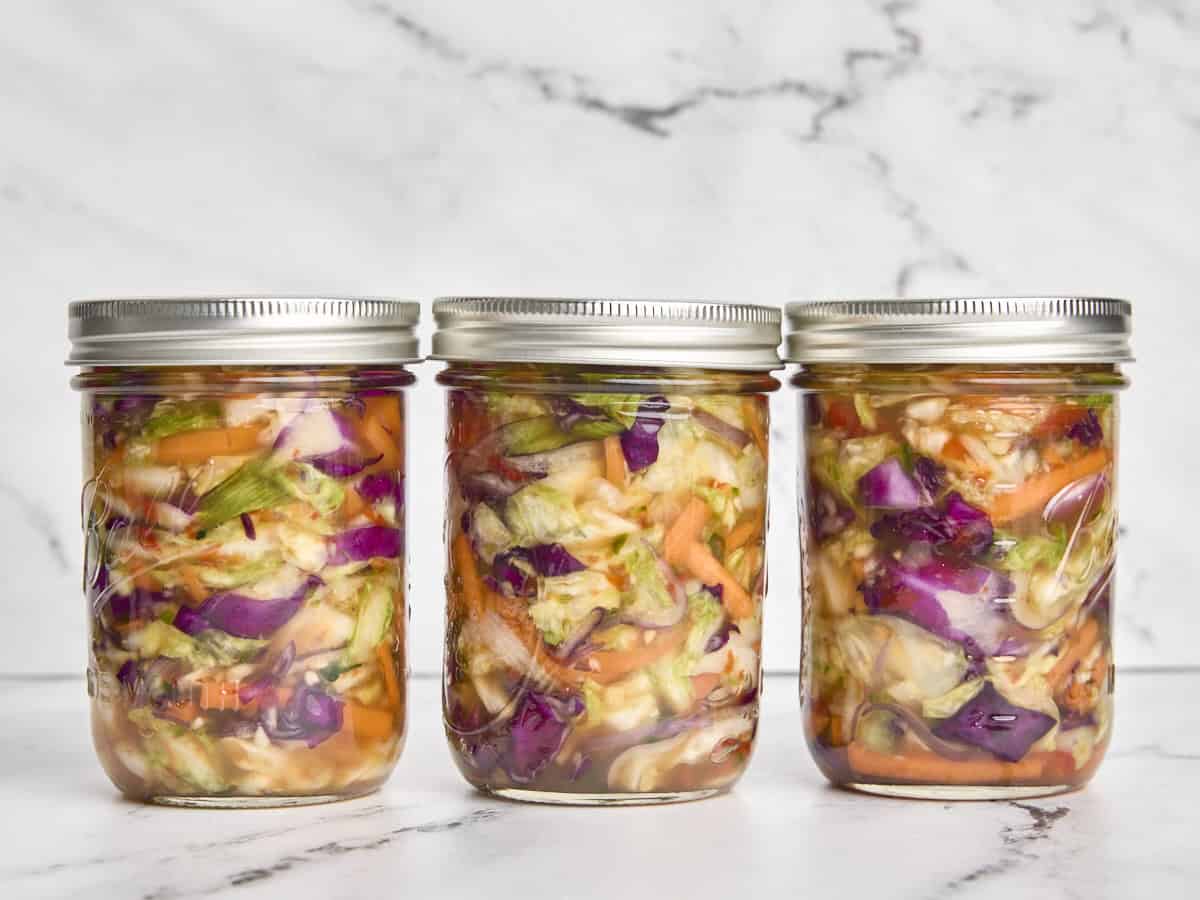
Add to jars: Again, with clean hands, use a spoon to add your veggie mix to the sterilized jars.
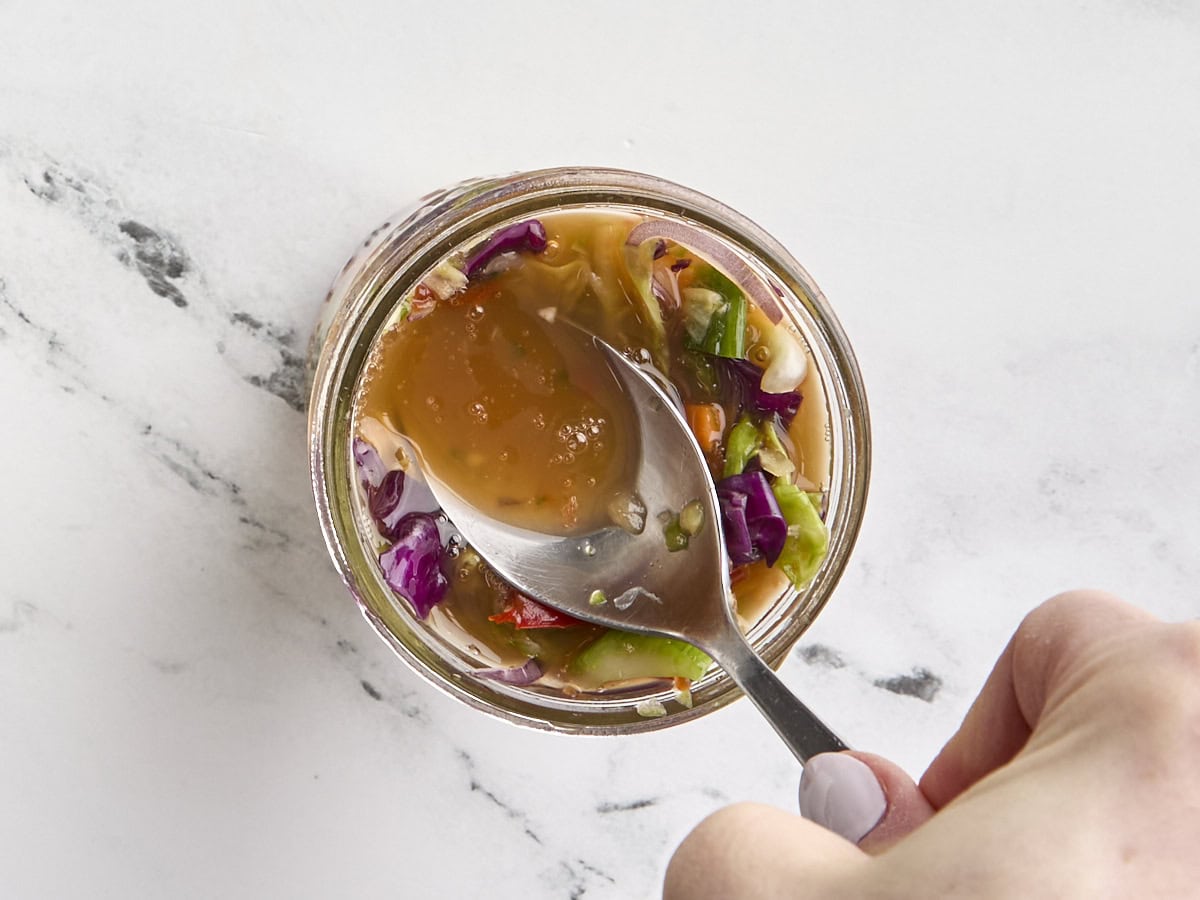
Push the mixture down firmly with your spoon once full (a significant amount of liquid brine should rise to the top, covering the homemade kimchi as you push down).
Don’t waste any of the brine from the bottom of the mixing bowl! Try to top off each jar with as much as you can. You ideally want all the veggies to be submerged in the brine for fermentation.
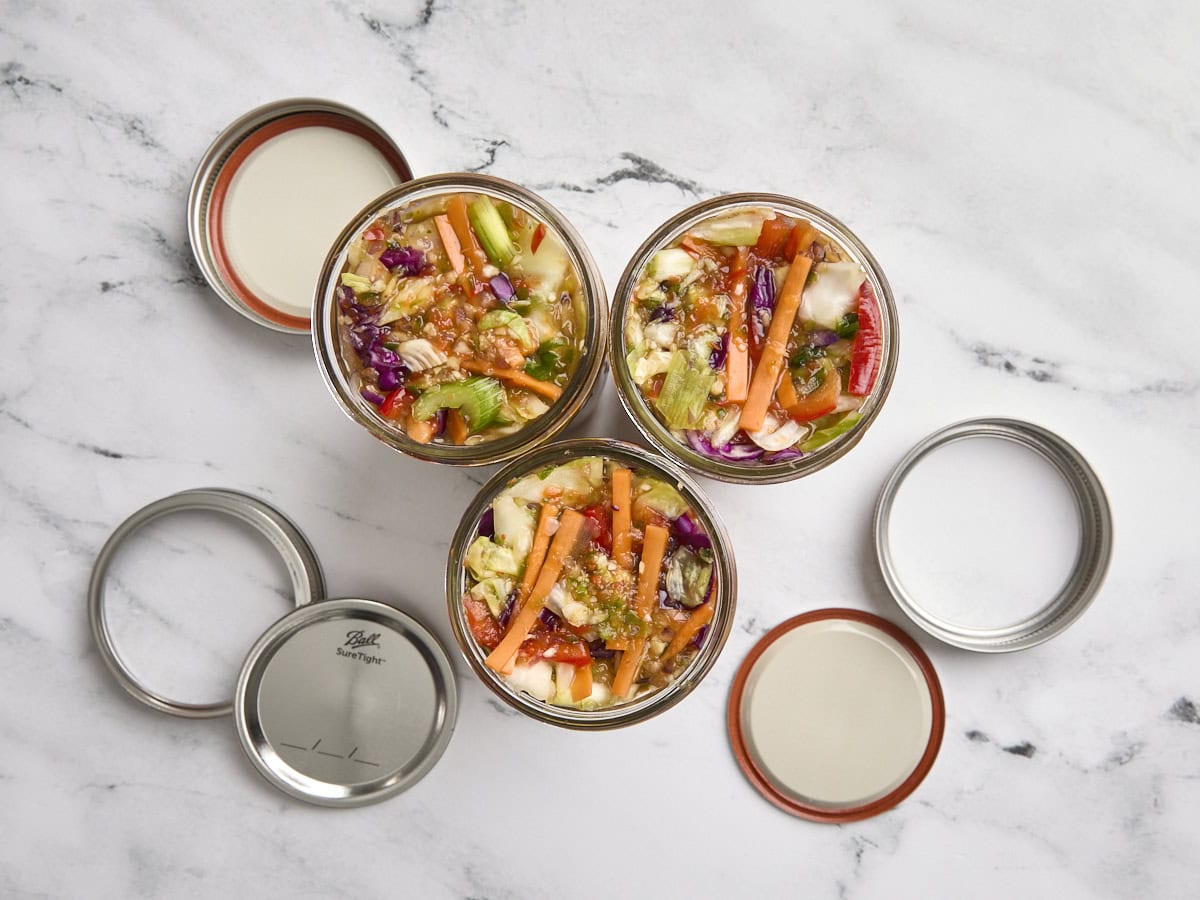
Ferment: Place the lids on the jars loosely and wipe down the sides of the jars. Now, place the jars in a dark place in your kitchen for 24 hours. (I like to place my jars in a spare Tupperware container and keep them under the sink so they are contained and in a warm(ish) place to help with the early fermentation process.)

Once it’s been 24 hours, carefully ”burp” each jar by removing the lid. This allows some of the naturally occurring gases from the fermentation process to escape the jars. If your kitchen is quite warm, you may want to ”burp” your jars after 12 hours, not 24, to release the gases and avoid any small explosions!
After the initial 24-hour fermentation period, you want to burp your jars every 8-12 hours until you see consistent and active bubbles whenever you open the lid. As soon as you see lots of bubbling on a regular basis, screw the lid on tight and transfer the jars into your refrigerator. Now it’s ready to be eaten!

I mentioned lacto-fermentation earlier, but I just wanted to touch on what that actually means. It’s a natural preservation process where good bacteria (lactobacillus) feed on the sugars in the veggies and produce lactic acid. That acid gives kimchi its tangy flavor and helps keep it safe to eat. This is the same process used when making sauerkraut and dill pickles. But before that can happen, we need to salt the veggies.
Salting helps draw out moisture, slows the growth of harmful bacteria, and creates a brine that sets the stage for fermentation. So, yes, all that massaging the veggies isn’t just a good workout—it’s vital for the lacto-fermentation process!
I love piling this recipe for kimchi on scrambled eggs…it adds just the right kick to a simple breakfast. For lunch or dinner, I’d toss it into fried rice or add it to an easy rice bowl (our Bibimbap recipe is perfect for this!). And, of course, I couldn’t make my kimchi spring rolls without it. Or, if you want a comfort food twist, it’s amazing in quesadillas with some melty cheese. You can also spoon it over grain bowls, stuff it into wraps and sandwiches, or add it to any salad for an extra punch of flavor.
This recipe can last for several months in an airtight jar in the fridge. Be sure to use clean fingers or utensils whenever you grab some, as introducing new bacteria can shorten its life span or throw off the flavor. Also, make sure the top layer is always submerged under the brine to keep everything fresh and safe. If anything starts to look or smell off, it’s best to toss it and start a new batch.
The post Homemade Kimchi appeared first on Budget Bytes.