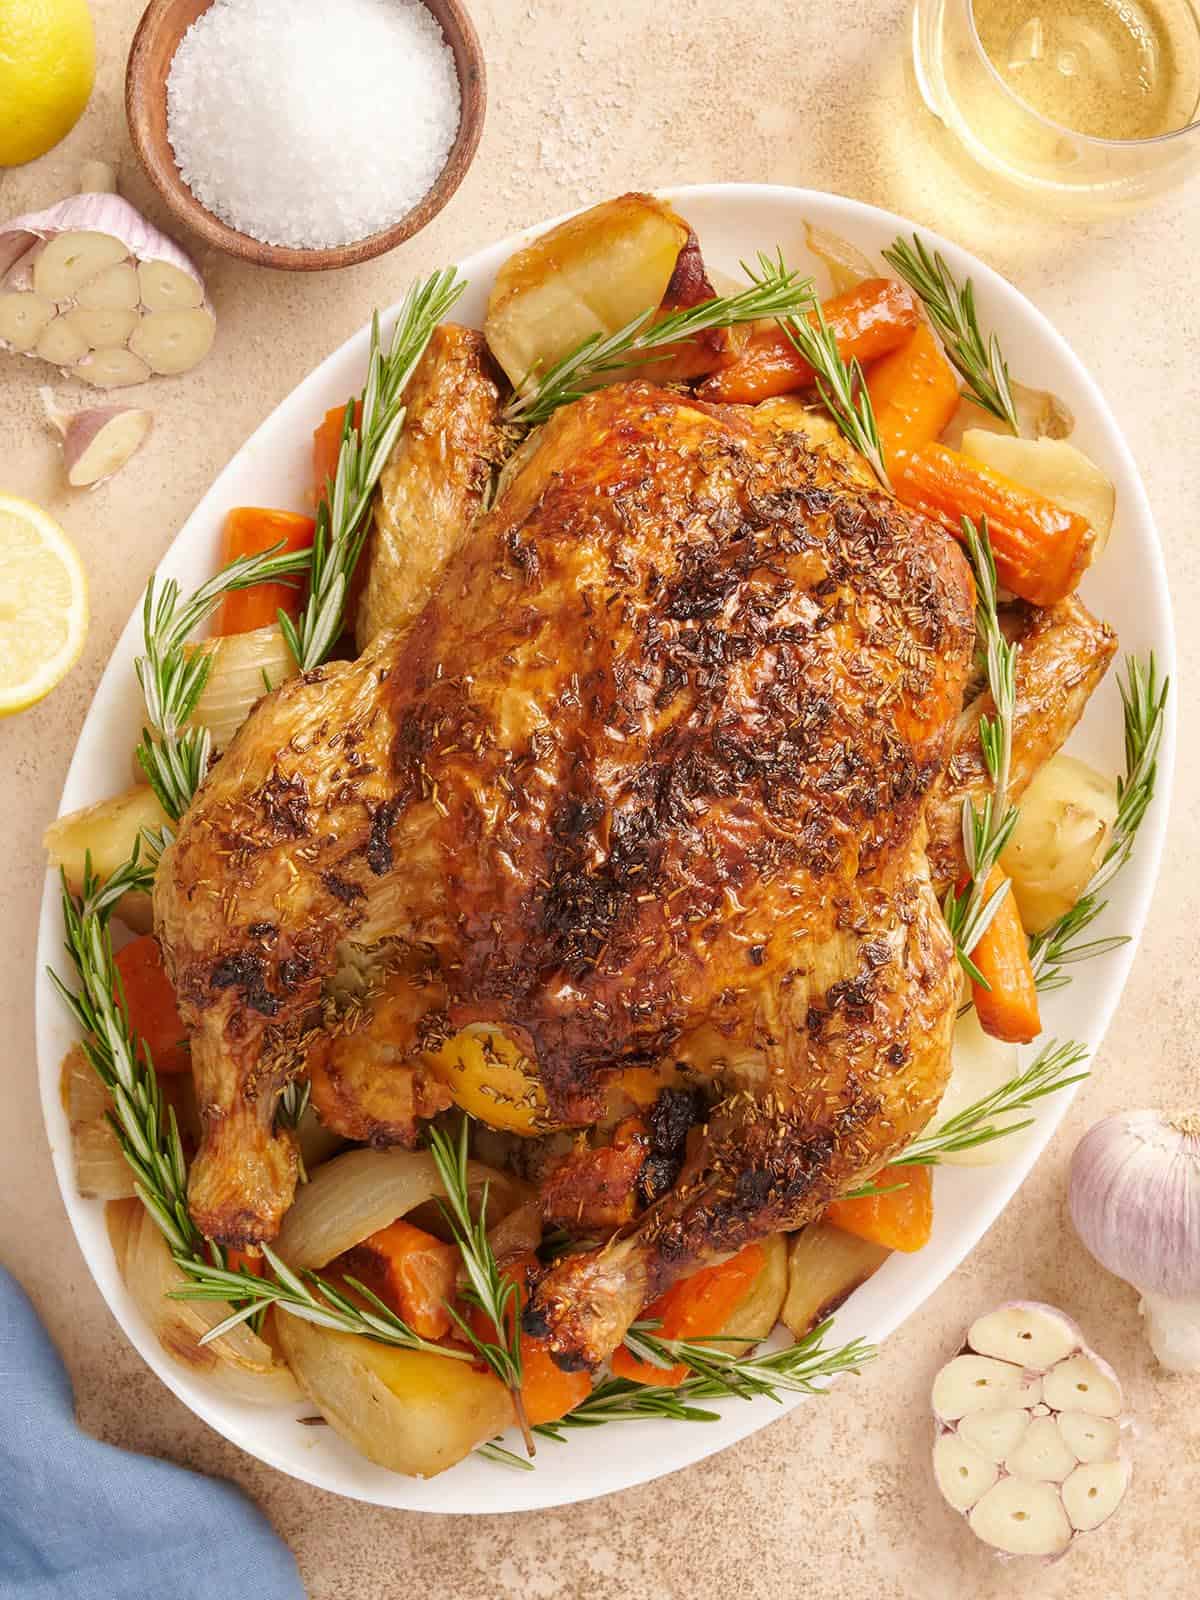
There’s nothing quite like this easy Roasted Chicken recipe. Every time I make it, the skin turns shatter-crisp from its butter bath, and the tender meat is softly scented with lemon, garlic, and rosemary. There’s also a mix of vegetables that cooks under the chicken and soak up the buttery chicken jus until they’re almost too good to share. And when you cook a whole roasted chicken, you can spin the leftovers into easy meals for days! Talk about a budget-friendly, meal-prep worthy dish. It truly is perfection.
“Have made this recipe multiple times with a 4 or 5 pound chicken and I love it so much. The meat comes out moist, the skin crispy. I make extra potatoes and carrots underneath and my partner described them as the best vegetables he has had (he doesn’t really like vegetables).”
Emily
I’ve tried all sorts of “tricks” over the years, but the method that gives me the juiciest, most flavorful roast chicken is wonderfully straightforward. The best and tastiest way to keep your chicken moist is to use a dry brine and rub your chicken down with softened butter. (Unless you save your bacon fat, in which case, you should definitely use that!) The dry brine tenderizes the meat, and the butter bastes the notoriously dry breast meat as it cooks. This keeps your bird juicy while adding a HUGE wallop of flavor. It will also give you deeply golden, crispy skin.
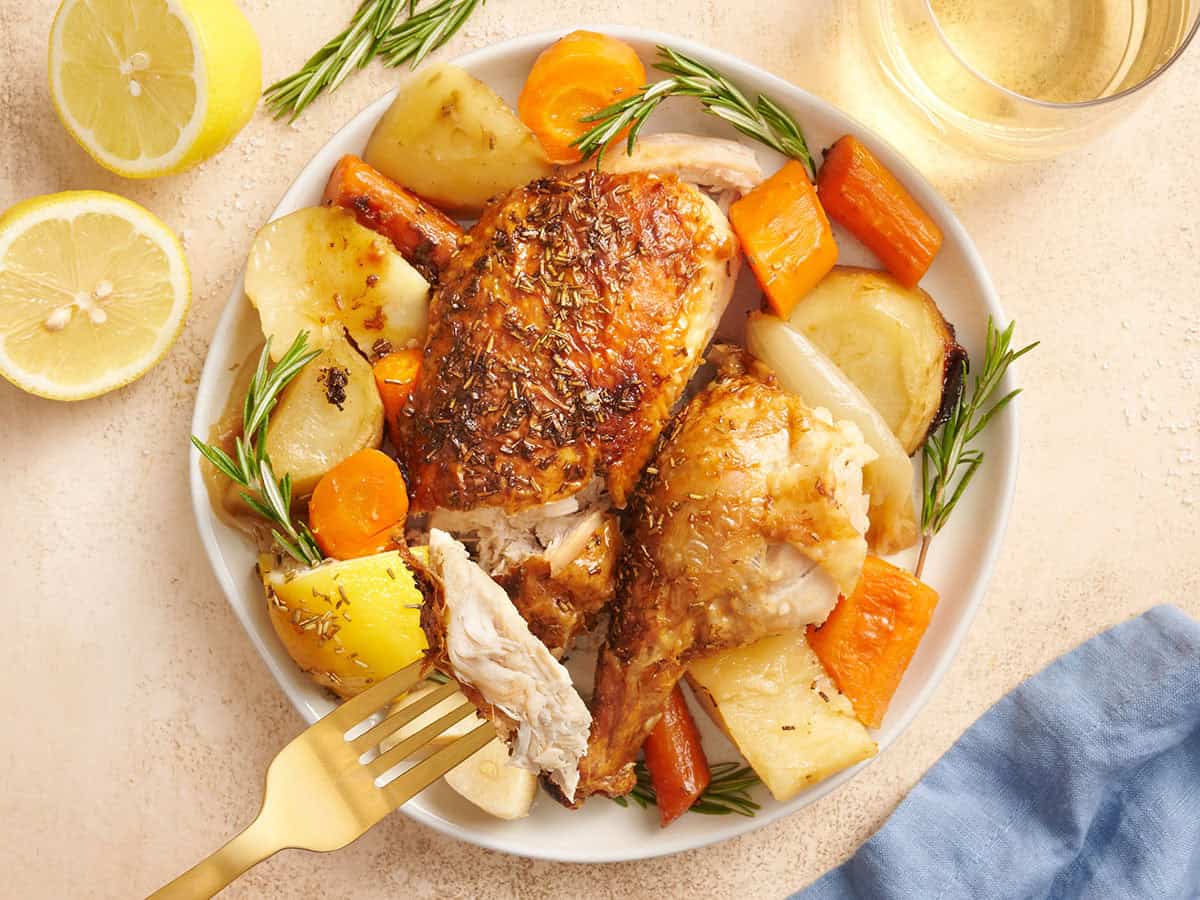
Now you’ve set the foundation for a perfectly oven-roasted chicken. But why stop there? As that chicken roasts and that butter melts, all of the drippings fall to the bottom of the pan. This is precisely why you fill the pan with carrots, onions, and potatoes. They soak up all that incredible juice and transform into intensely flavored, unctuous bites.
For the uninitiated, roasting a whole chicken in the oven can be intimidating. It used to make me nervous, too! But I’m telling you, it’s easier than you think. You just need to know a few helpful pointers, and lucky for you, I’ve gathered plenty over the years. It all comes down to drying your chicken, using salt correctly, introducing fat to keep the breast meat moist, and using the cavity as a vehicle for flavor.
To make the best roasted chicken, use these four tricks:
I show each of these tips in action in the recipe below so you can follow along and feel confident doing it yourself!

See how we calculate recipe costs here.
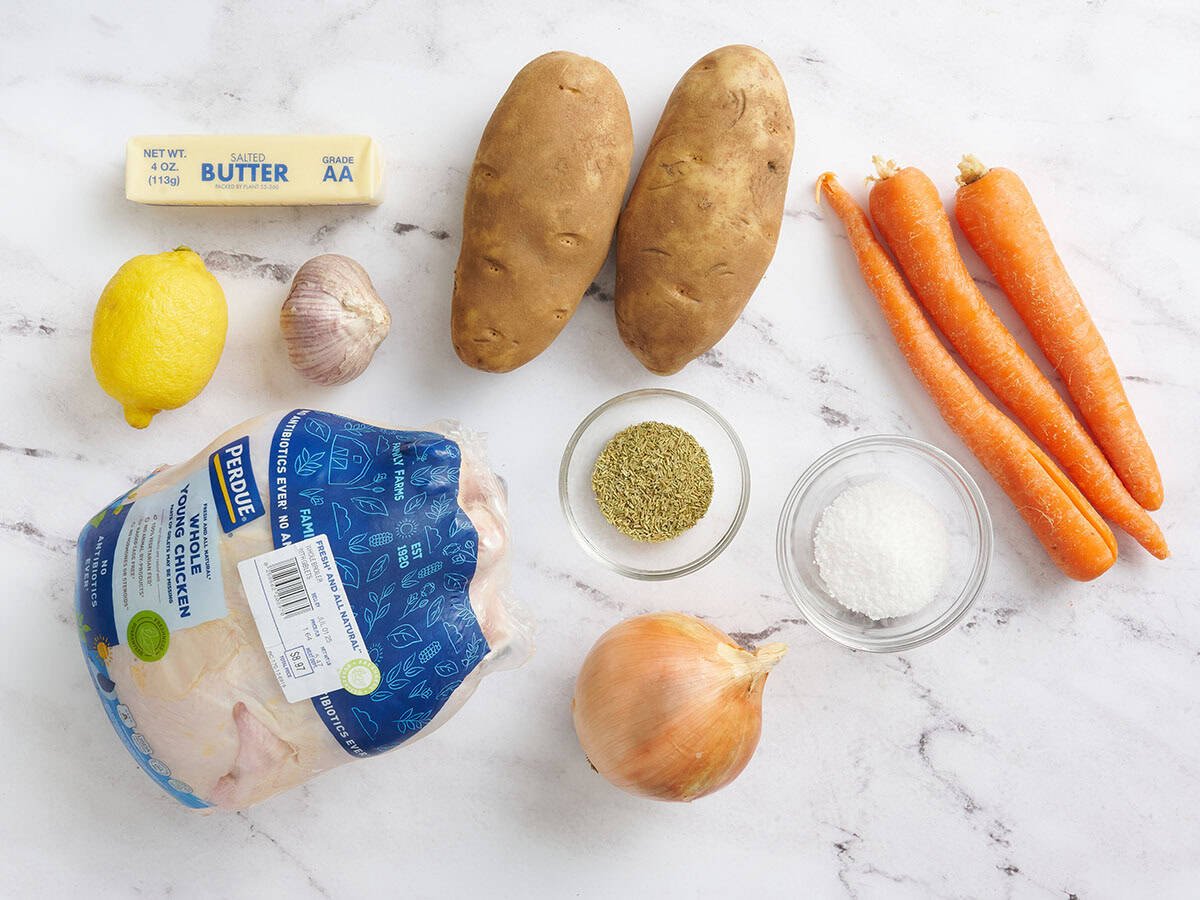
Gather all of your ingredients. Set your oven rack in the middle and warm the oven to 425°F. Take the chicken out of its packaging.
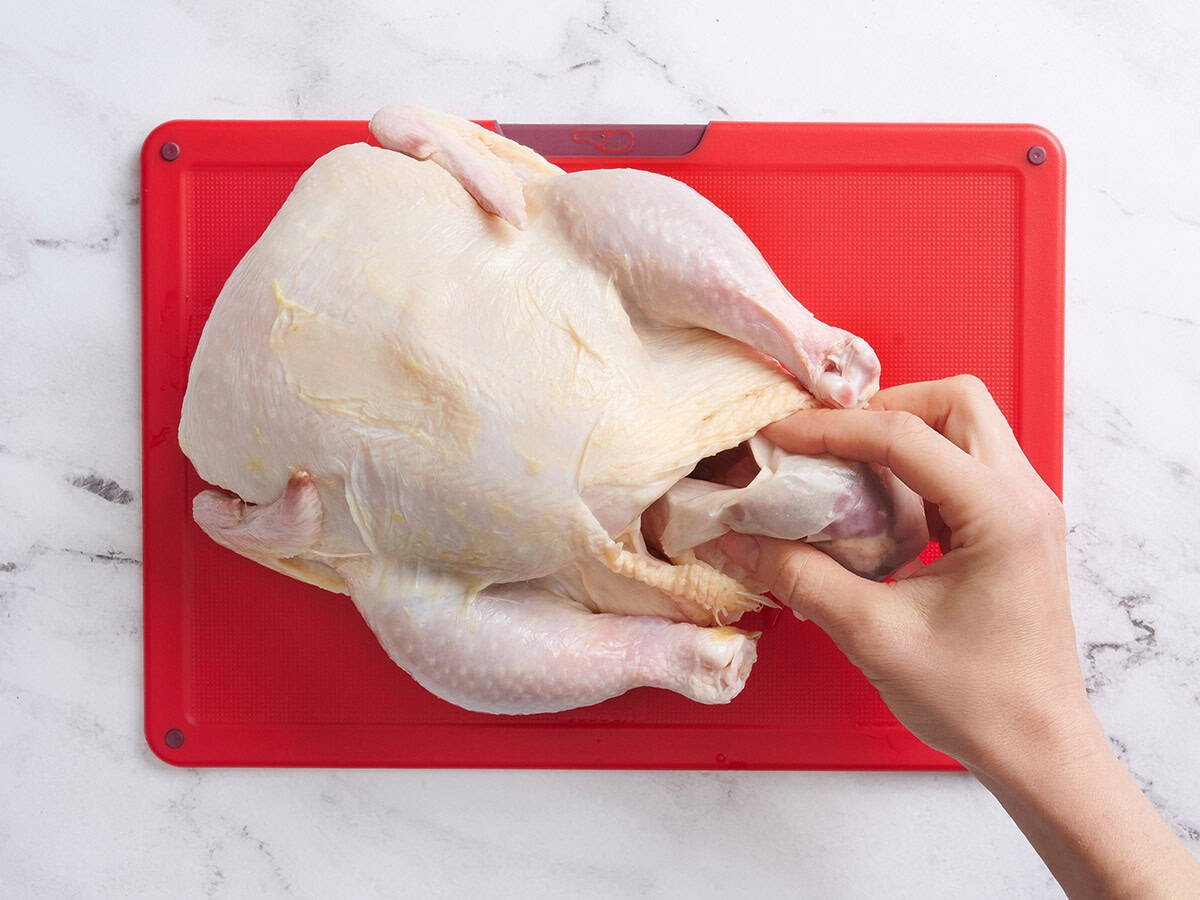
Prep the chicken: Remove the innards from your chicken. Reserve them for chicken stock.
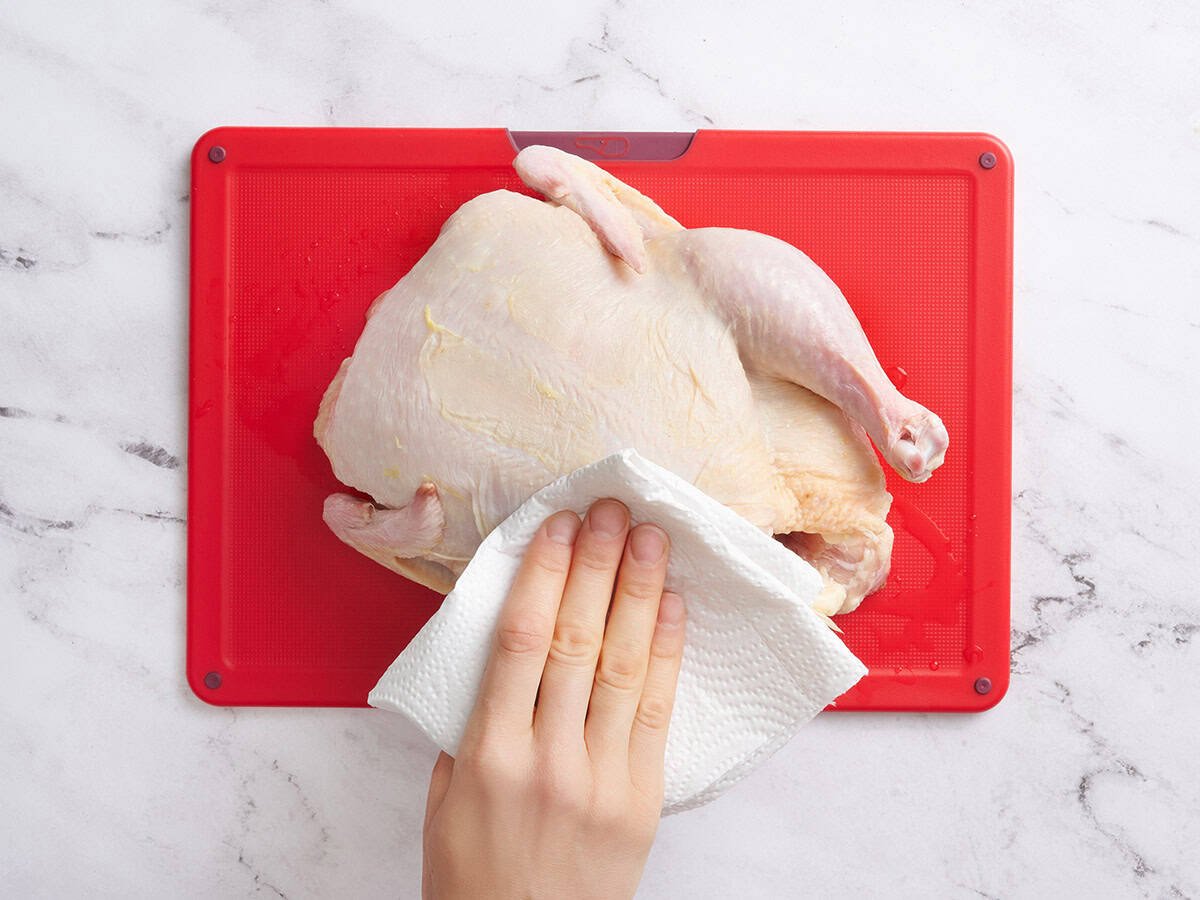
Dry the chicken thoroughly inside and out with paper towels.
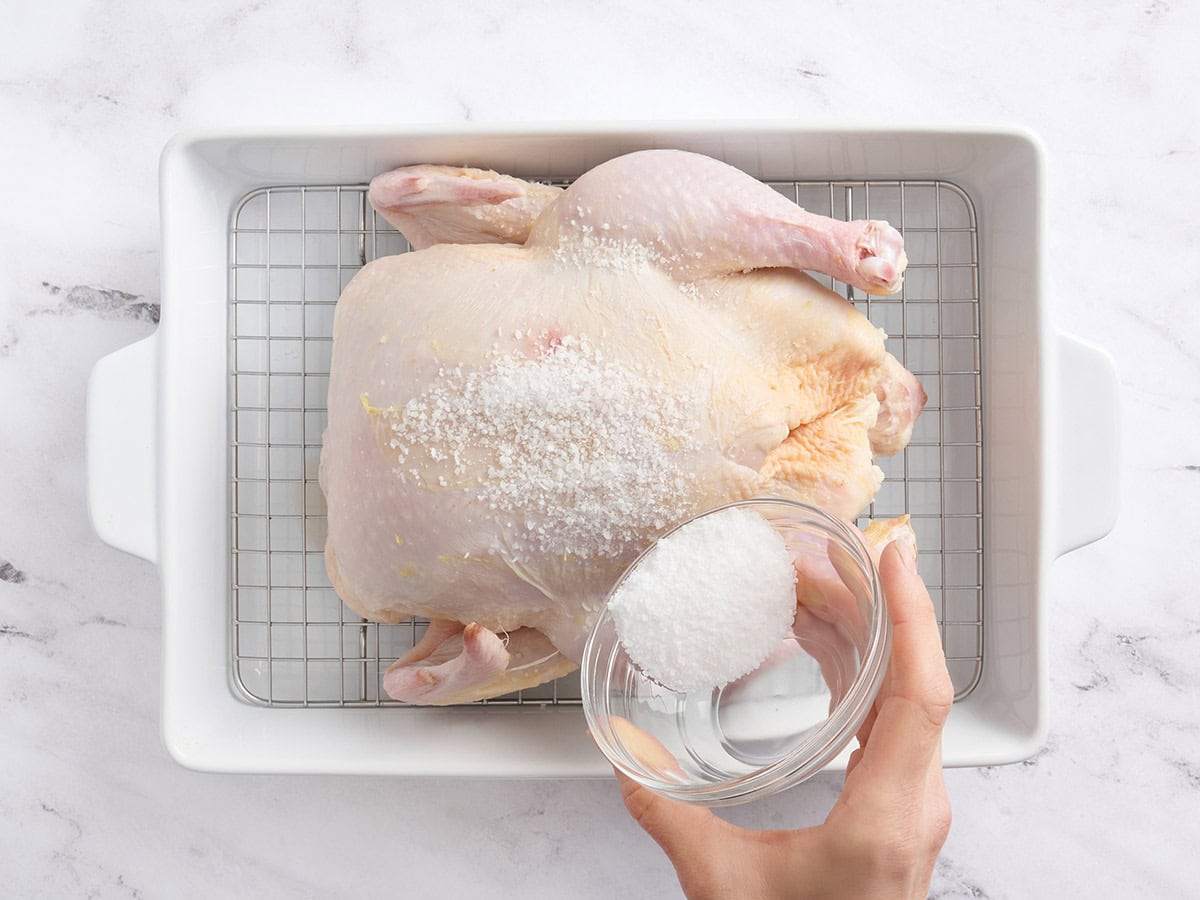
Dry brine the chicken: Season the chicken with a dry brine by rubbing salt all over the surface of the skin and inside the cavity. Stick to 1 teaspoon of kosher or coarse sea salt per pound, or 1/2 teaspoon per pound if you’re using fine sea salt or iodized salt. Leave the chicken uncovered in the fridge for at least an hour, though overnight is ideal.
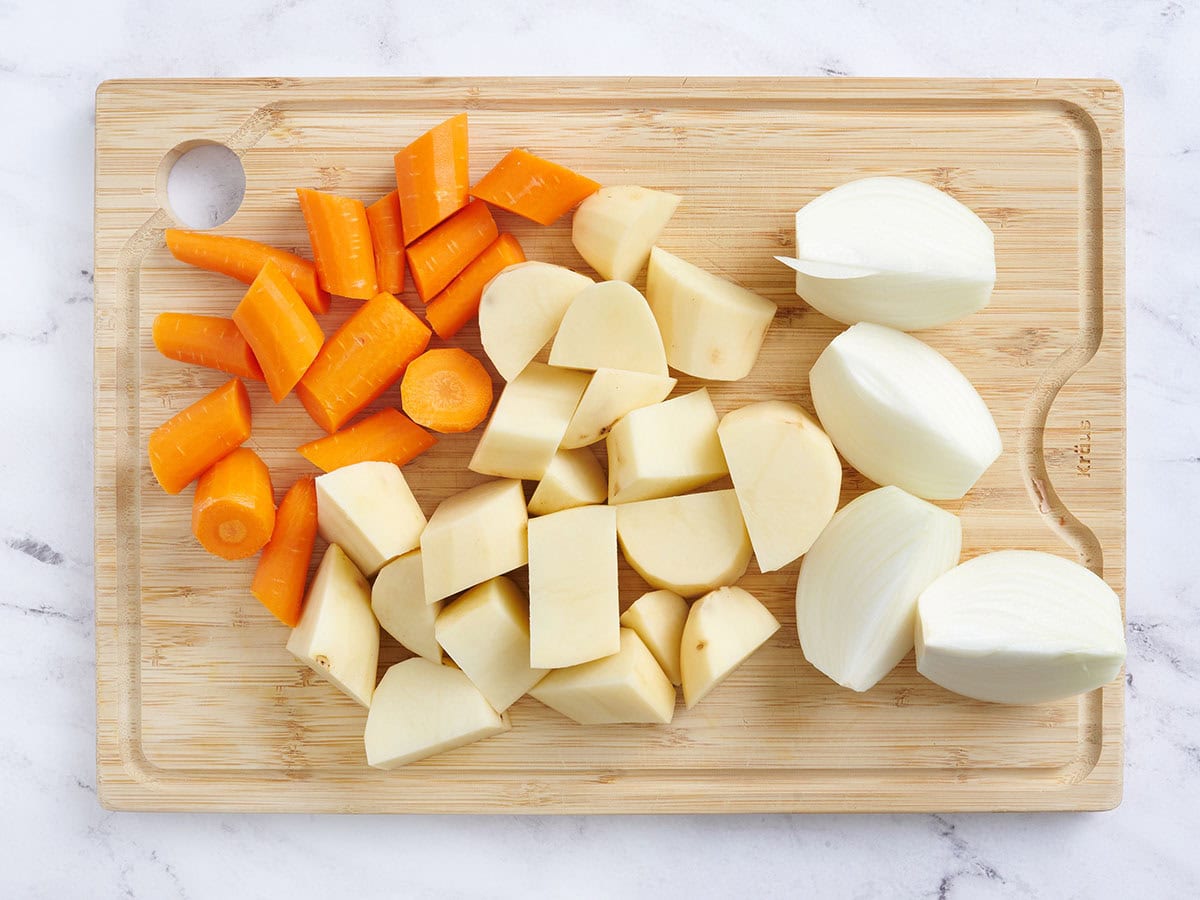
Prep the veggies: When the chicken has brined for an hour, chop the vegetables. Quarter an onion, slice 3 carrots, and quarter 2 potatoes.
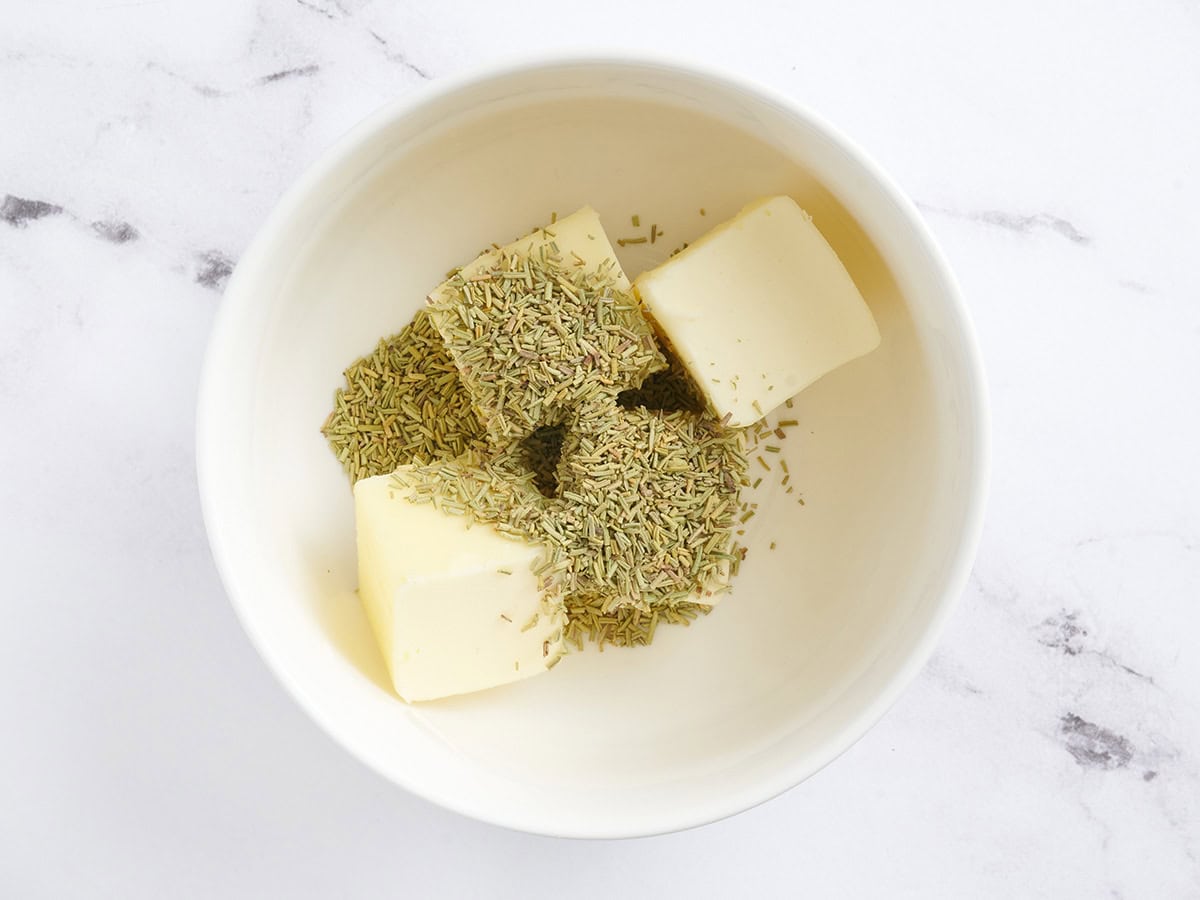
Make the herb butter: Add 1 Tbsp of dried rosemary to the softened 8 Tbsp of butter and mix thoroughly.
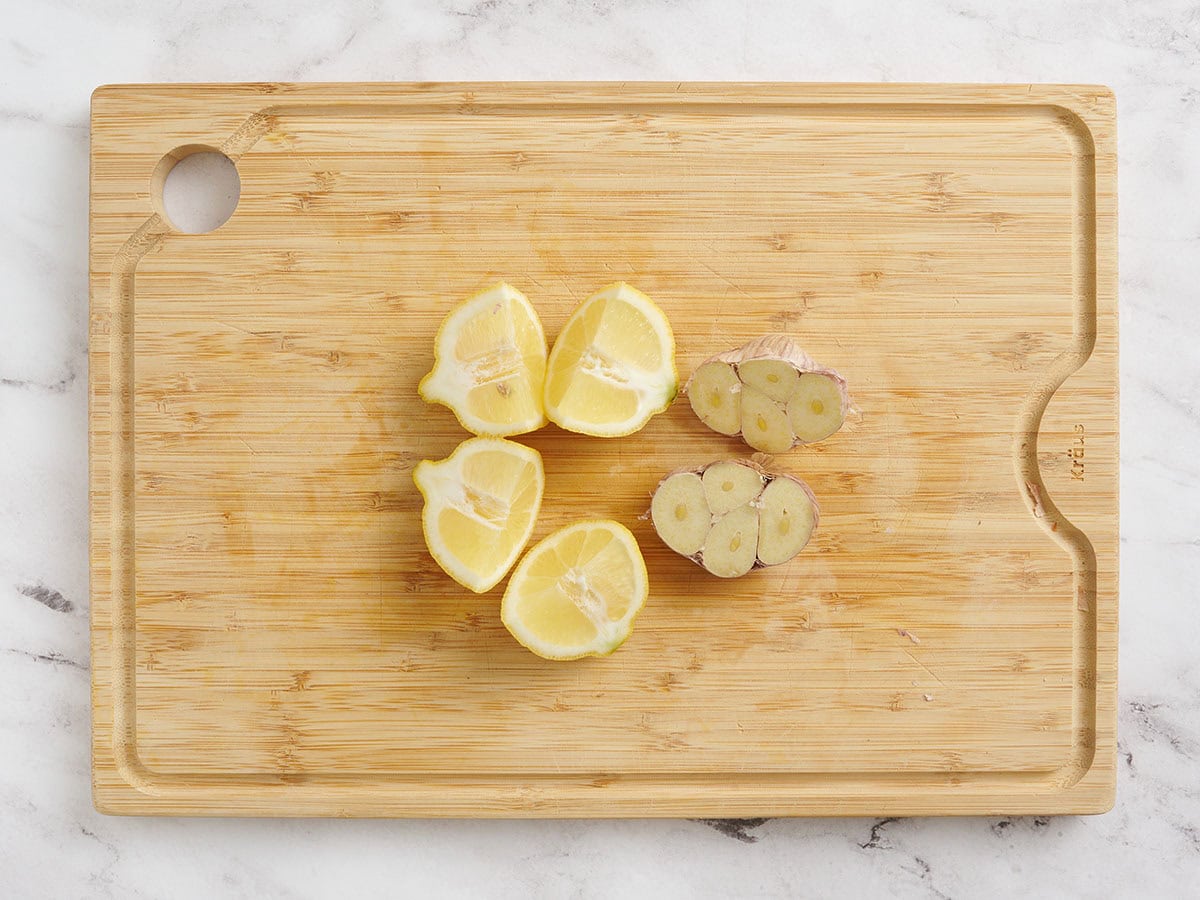
Slice the aromatics: Slice the garlic bulb in half and cut the lemon into quarters.

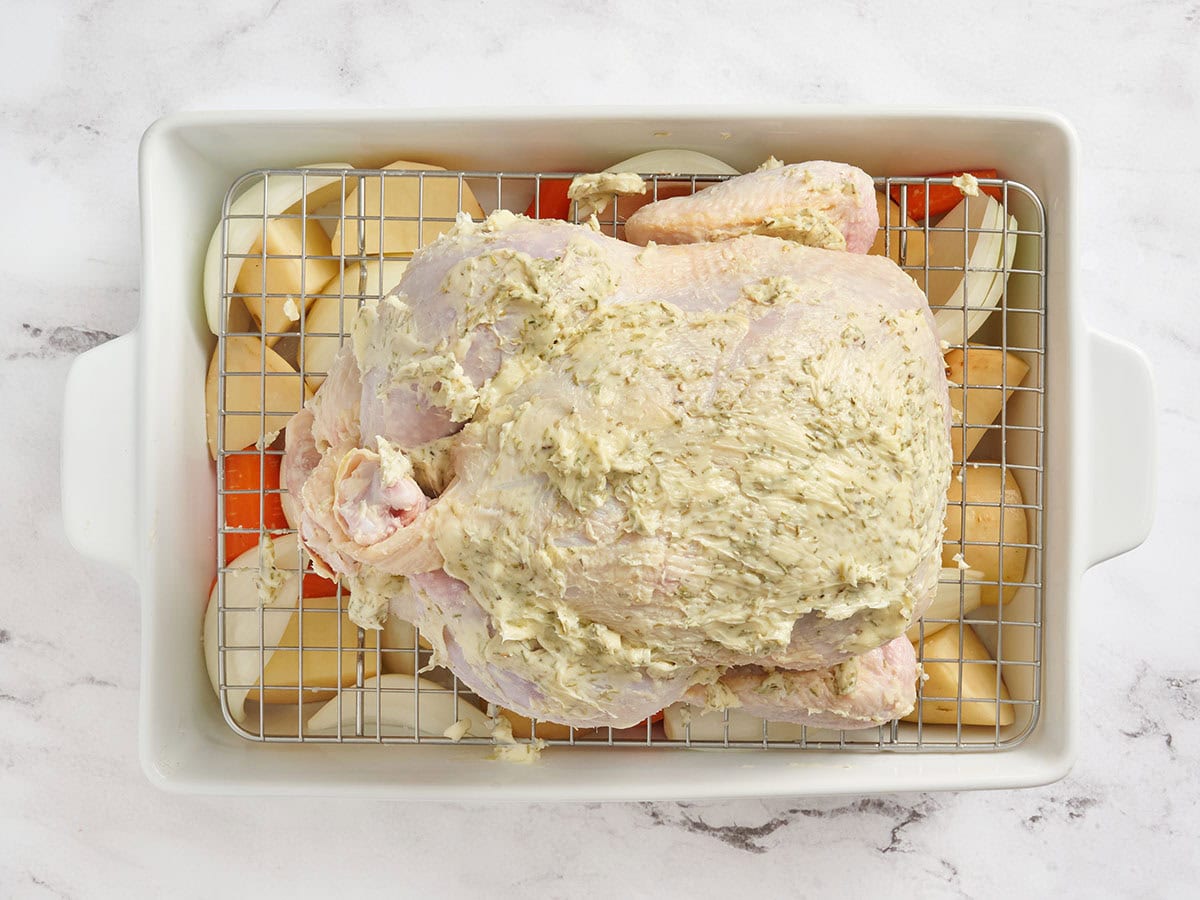
Get ready to roast: Spread the prepared vegetables across the bottom of your roasting pan.
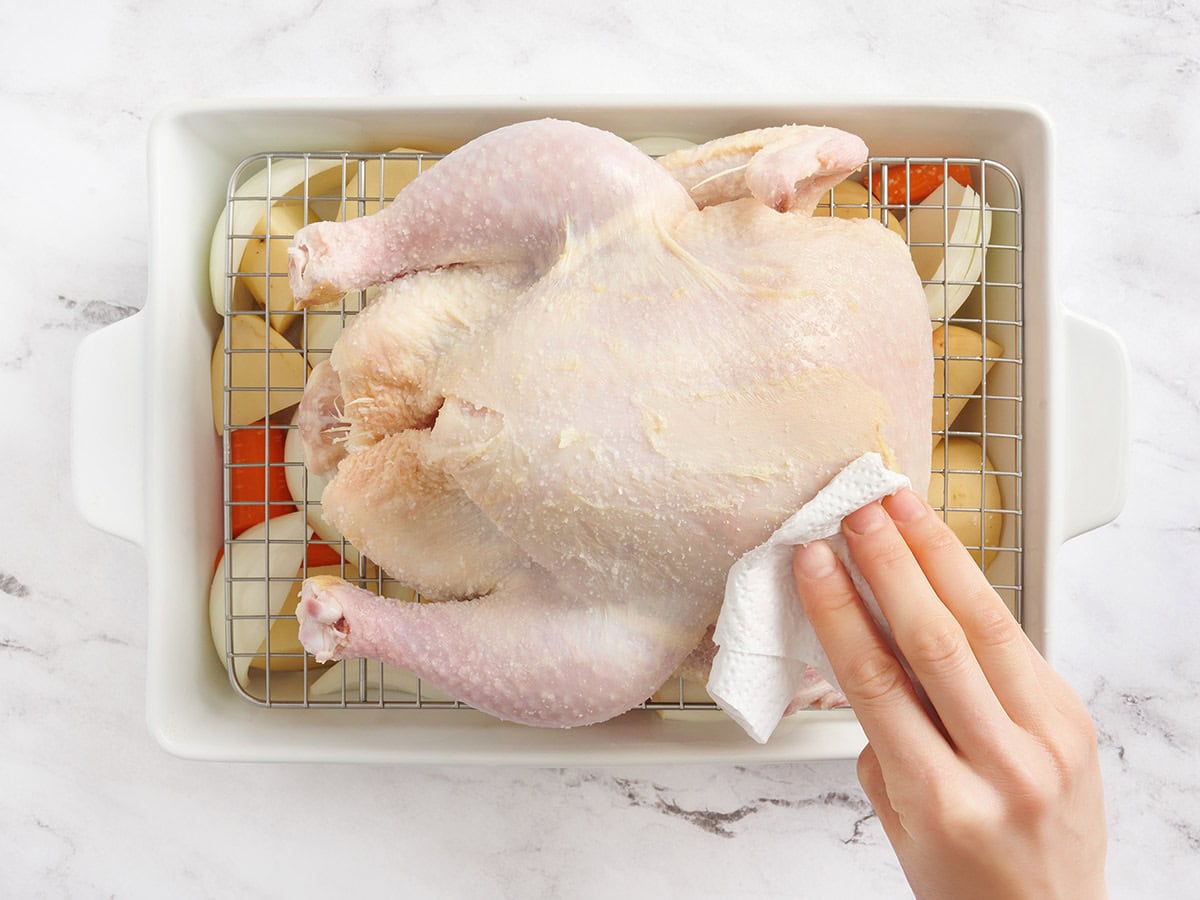
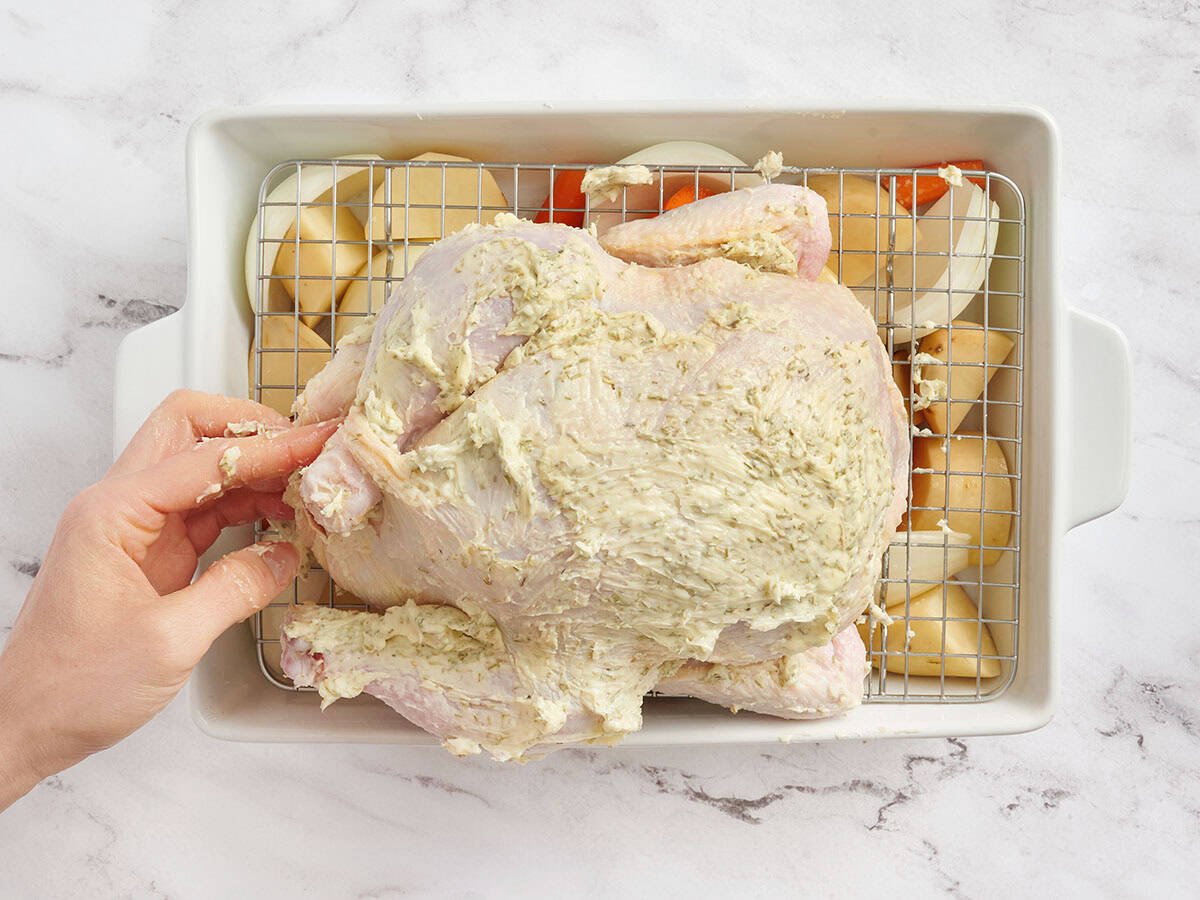
Set the chicken on a rack over the veggies, pat it dry one more time, and brush away any excess salt.
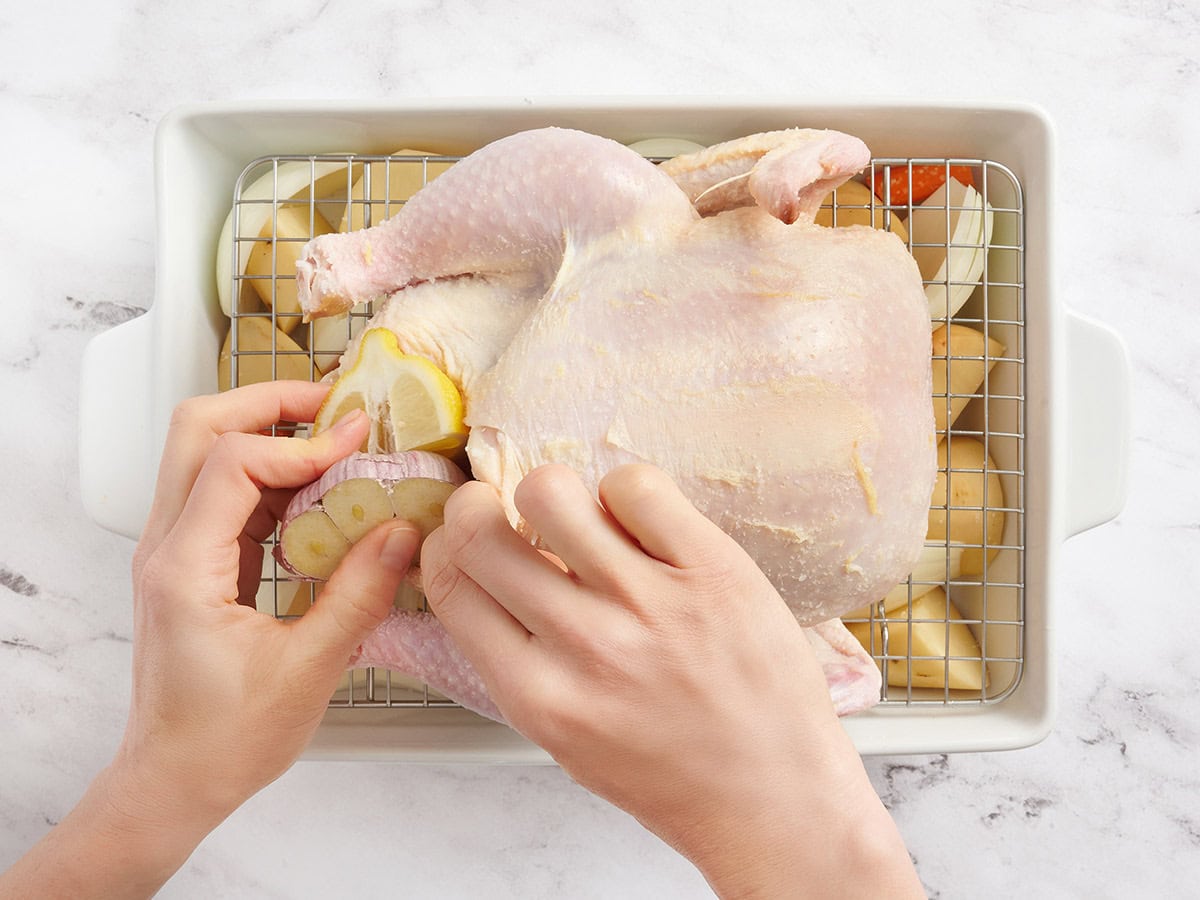
Tuck the garlic and lemon pieces into the cavity of the chicken.
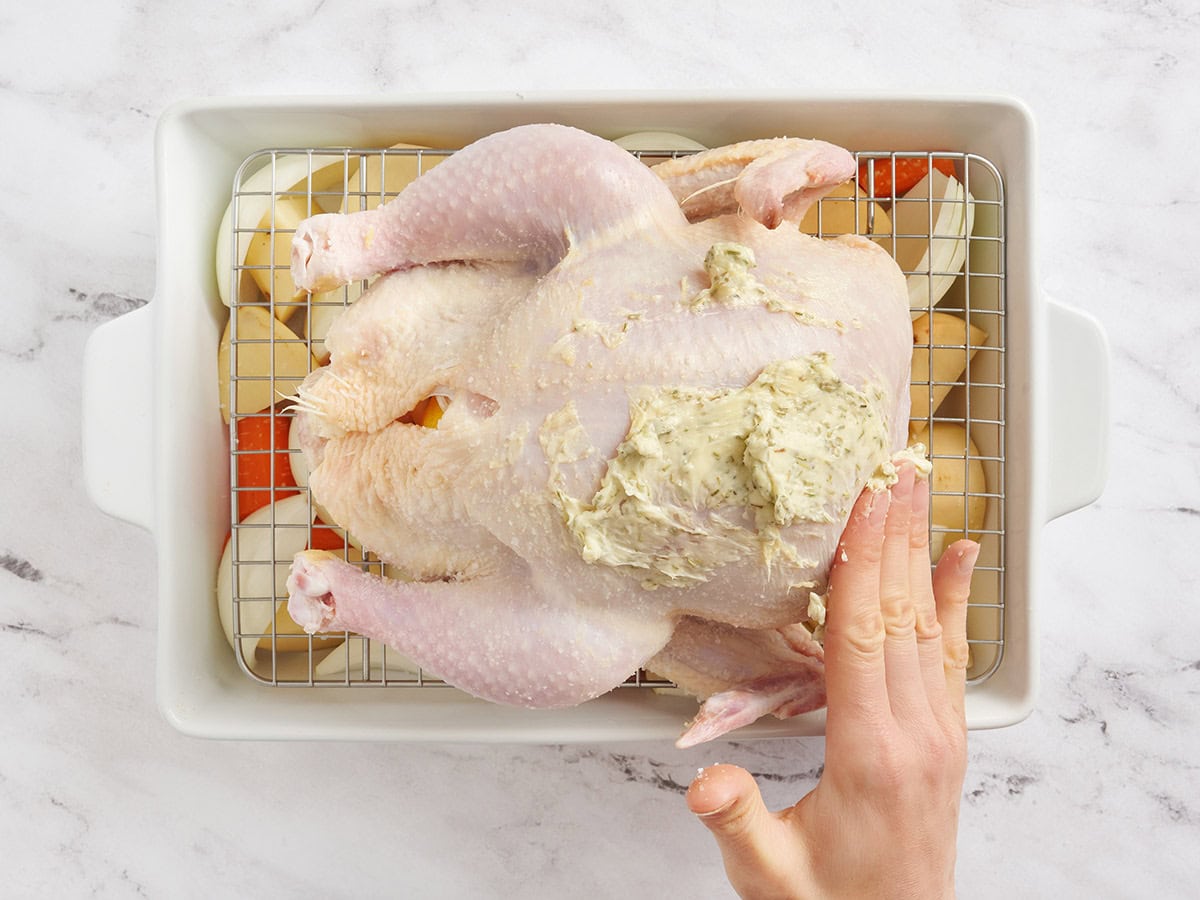
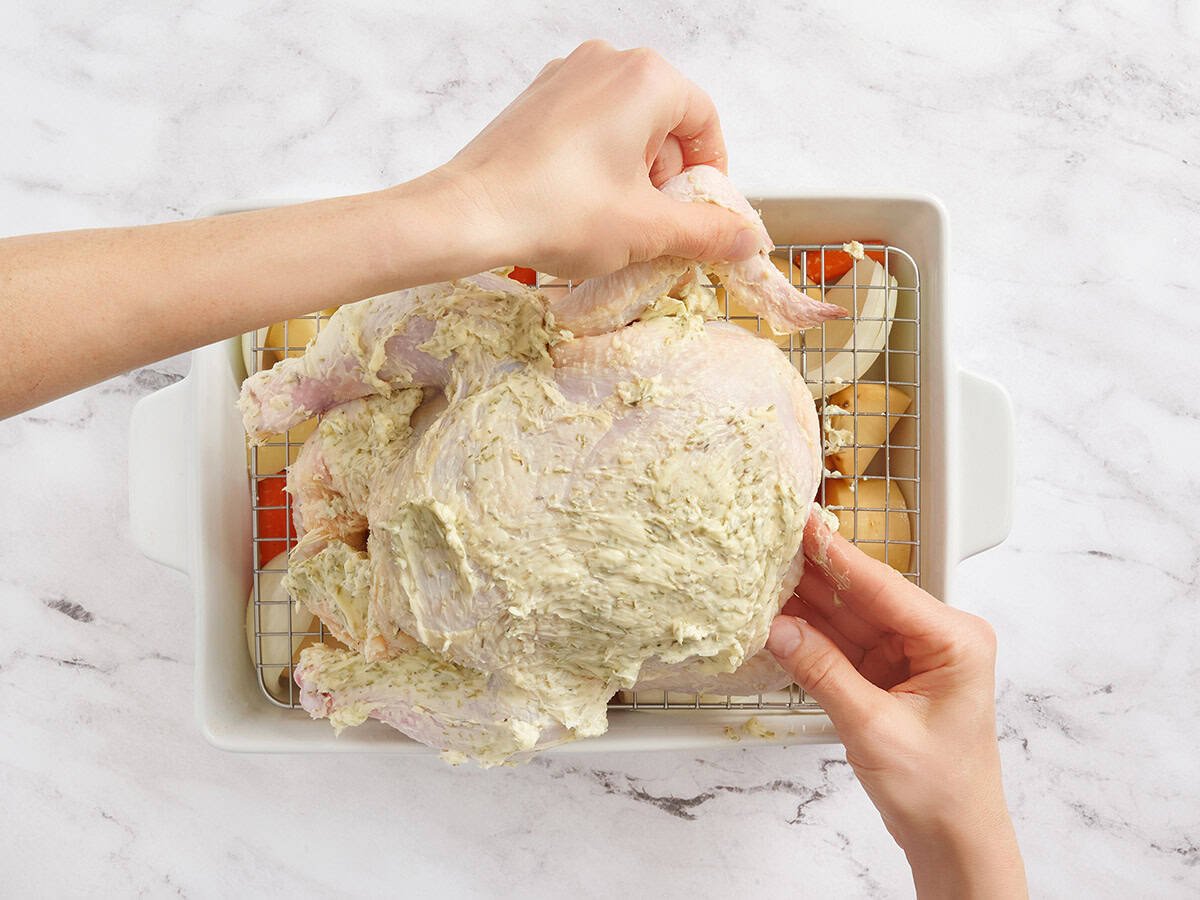
Cover the chicken inside and out with the herb butter. Work your way under the skin on the breast and add butter there too.
Truss the chicken: For a simple twine-free truss, fold the wings behind the chicken so they don’t burn.
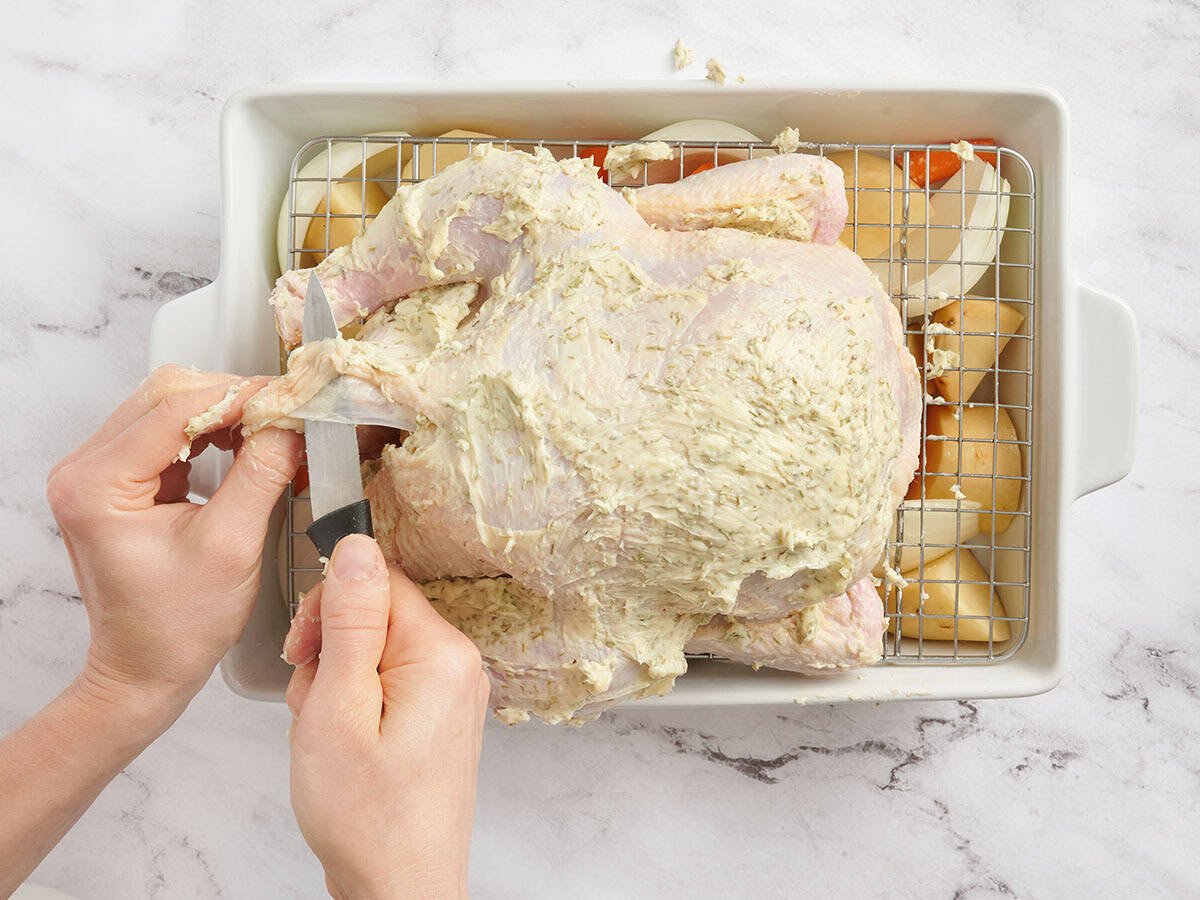
Then use a knife to make a small slit in the skin flap near the cavity opening…
…and slip both drumsticks through the opening.
Don’t worry if the legs pop out as the chicken cooks. It’ll still help to keep your chicken plump and make sure it roasts perfectly.
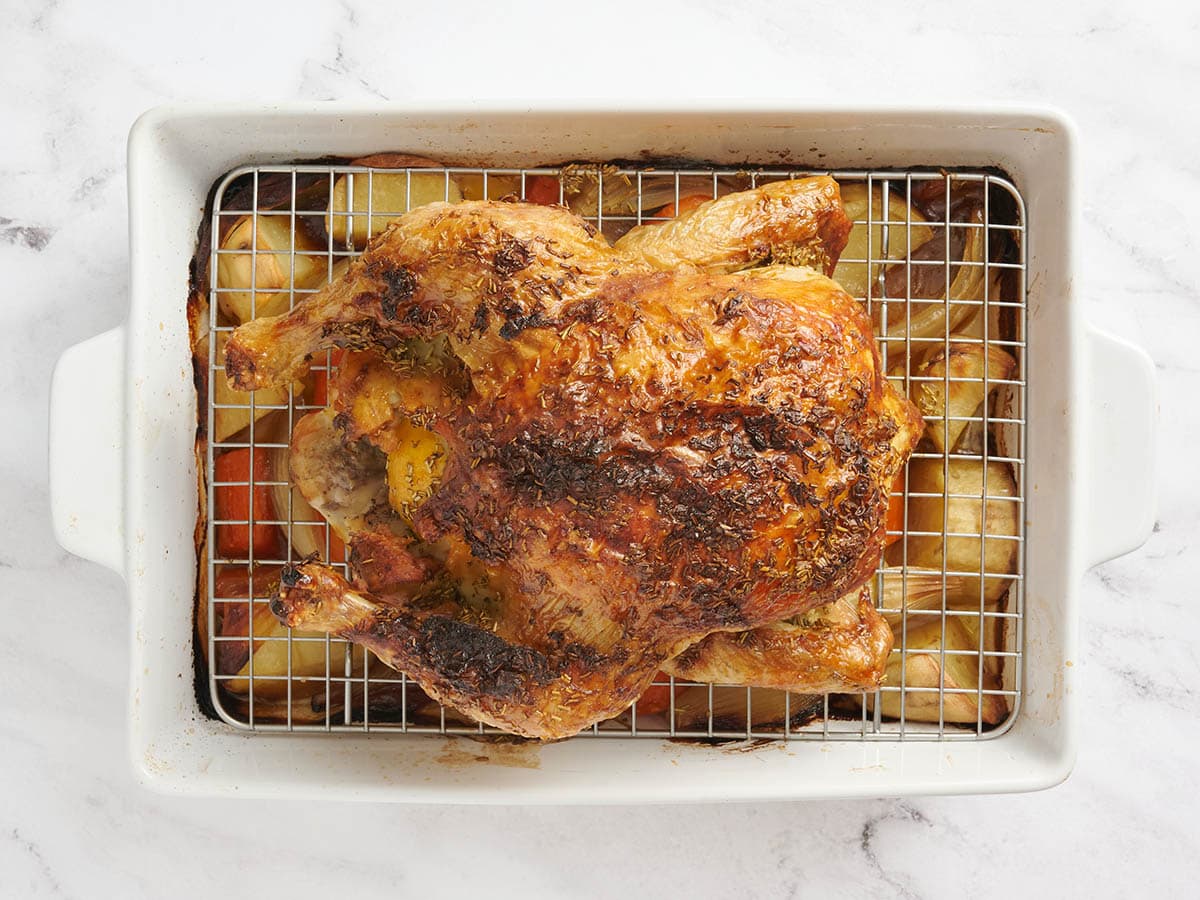
Cook: Roast at 425°F for roughly 20 minutes per pound, or until a thermometer reads about 160°F in the breast and 170°F in the thigh. Move the chicken to a platter and let it rest for at least ten minutes before slicing. Serve with the roasted vegetables and spoon any pan drippings over the top. Enjoy.
Pull any leftover meat off the bones and store it in an airtight container. Reserve the bones for chicken stock. Simply add them to a freezer-safe container and freeze them until you are ready to use them. Use the pulled chicken for other recipes.
This recipe is fail-safe, so even beginners can follow the directions and feel confident from start to finish! However, here are a few extra tips and explanations to make it even easier:
Dry brining is the act of salting chicken (or any other meat) and letting it sit uncovered while the salt draws out the juices. The chicken then reabsorbs the now-salted juices, which tenderize the meat and add deep flavors all the way to the bone. This is far superior to just salting the skin on the outside, which leaves you with a bland bird.
You can dry brine for as little as an hour, but if you want real magic, dry brine your chicken overnight. Leave it uncovered in your fridge, on the bottom shelf, for at least 8 hours.
Leaving the chicken’s cavity empty is a missed opportunity to add flavor. Stuff the cavity with aromatics, like garlic and lemon. If you have fresh rosemary, put a sprig in there as well. (If you don’t, that’s OK. You add dried rosemary to your butter in this recipe.) As the chicken cooks, the garlic, lemon, and rosemary release their essences and perfume your entire bird, from the inside out.
I know, I know. Every time you see someone cooking chicken on TV, there’s always a scene where they have the oven door wide open as they baste their chicken in its juices. Don’t believe the hype. (Said in my best Flavor Flav.) You don’t have to baste chicken to get juicy results. That’s what the dry brine was for in my recipe—leaving the oven door open to baste lets all of the heat escape and ruins the roast.
Insert a thermometer into the breast and pull the chicken at 160°F. Avoid touching the bone for an accurate reading. Then, check the thickest part of the thigh and look for about 170°F, again without hitting the bone.
Remember the magic of carry-over cooking. The chicken will continue to rise in temperature when it is out of the oven.
No thermometer?
If I’m not serving the whole roasted chicken right away, I love shredding the leftovers and turning them into something new. You can spoon it into a cozy chicken pot pie soup, fold it into a traditional chicken salad, simmer it into a white chicken chili, or toss it into our one-pot creamy Cajun chicken pasta (to name a few options!). Add the cooked chicken to any recipe that needs a quick protein boost, and you’ve got an easy meal ready to go. You can also simmer the bones and create chicken stock!
After the roasted chicken cools, pull the meat from the bones and store it in an airtight container along with any pan drippings to keep it moist; it will stay fresh for 3–4 days in the fridge. You can also refrigerate any leftover veggies. When reheating, warm the chicken gently by adding a splash of broth, covering the dish, and heating in a 325°F oven or in short, covered microwave bursts. For longer storage, freeze the meat (with drippings or a little broth) for up to 3 months, then thaw in the fridge and reheat the same low-and-slow way to keep it tender and juicy.
Our Roasted Chicken recipe was originally published 11/2/22. It was retested, reworked, and republished to be better than ever 12/10/25.
The post Roasted Chicken appeared first on Budget Bytes.