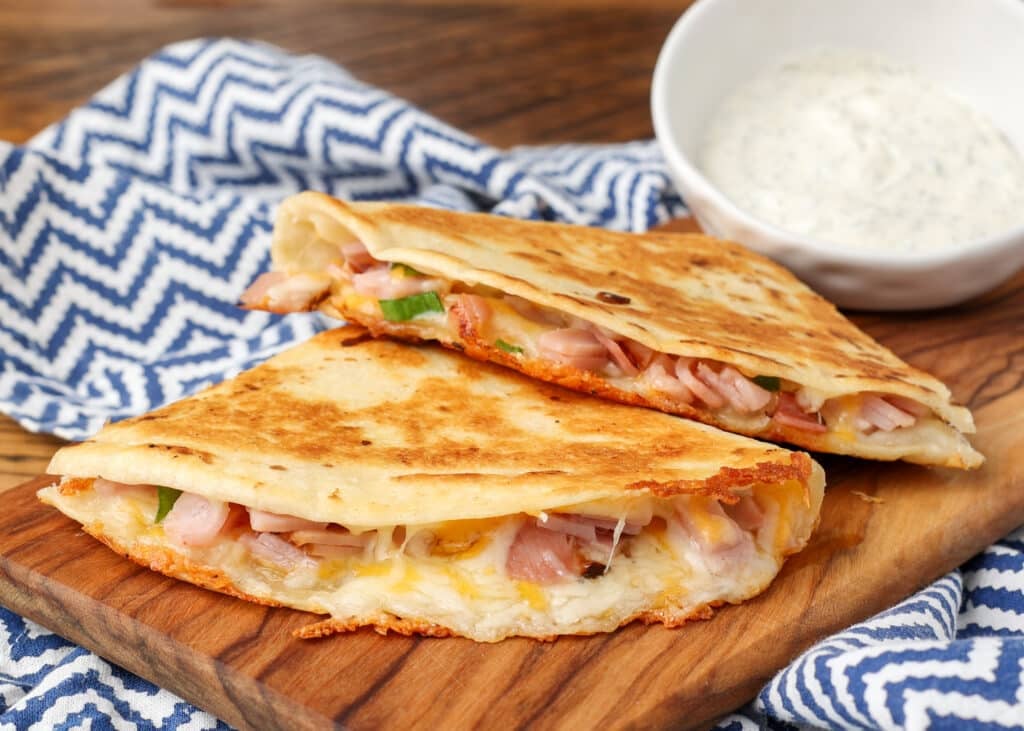
The crispy golden tortilla of this Ham and Cheese Quesadilla contains gooey melted cheese and warm slices of savory, deli meat. Each bite is a satisfying blend of classic flavors, making this an easy choice. And, I should know! I choose quesadillas more than just about anything else when it comes to lunchtime.
If there’s one thing I’ve learned after making hundreds of quesadillas, it’s that once you understand the method, you can riff on it pretty much forever. And, since I love ham and cheese (ahem, ham and cheese biscuits), it was just a matter of time. I’m happy to report that this irresistibly crunchy quesadilla absolutely nails the classic combo that I love.

I’ll be honest. Some days, I don’t want trendy flavors. And, when I’m just in the mood for something reliable, ham and cheese is a combination that always delivers. It feels like comfort food, with almost no effort at all.
I also love how approachable this quesadilla is. Not everyone has cooked chicken, leftover steak bites, or a batch of caramelized onions waiting in the fridge. But, almost everyone has some version of ham and cheese in their deli drawer. This one proves that even a beginner cook can transform simple ingredients into an absolutely mouth-watering lunch or snack. Try it and see!
Flour Tortillas – I love the flavor and texture of flour tortillas. I use them exclusively in quesadillas like this.
Ham – Thinly sliced ham is my preference here. It warms quickly, and makes it easy to layer evenly with the cheese. But, any fully cooked ham will work in a pinch.
Cheese – You’ll find that any good melting cheese makes for a great quesadilla. Freshly shredded Monterey jack and pepper jack, even pre-shredded Mexican cheese blends, they all work nicely in this one.
Butter – A thin layer of butter allows the tortilla to brown evenly in the pan. You can use a neutral oil, if you prefer.
Preheating the Pan: Pop your favorite non-stick skillet onto the stove over medium heat.
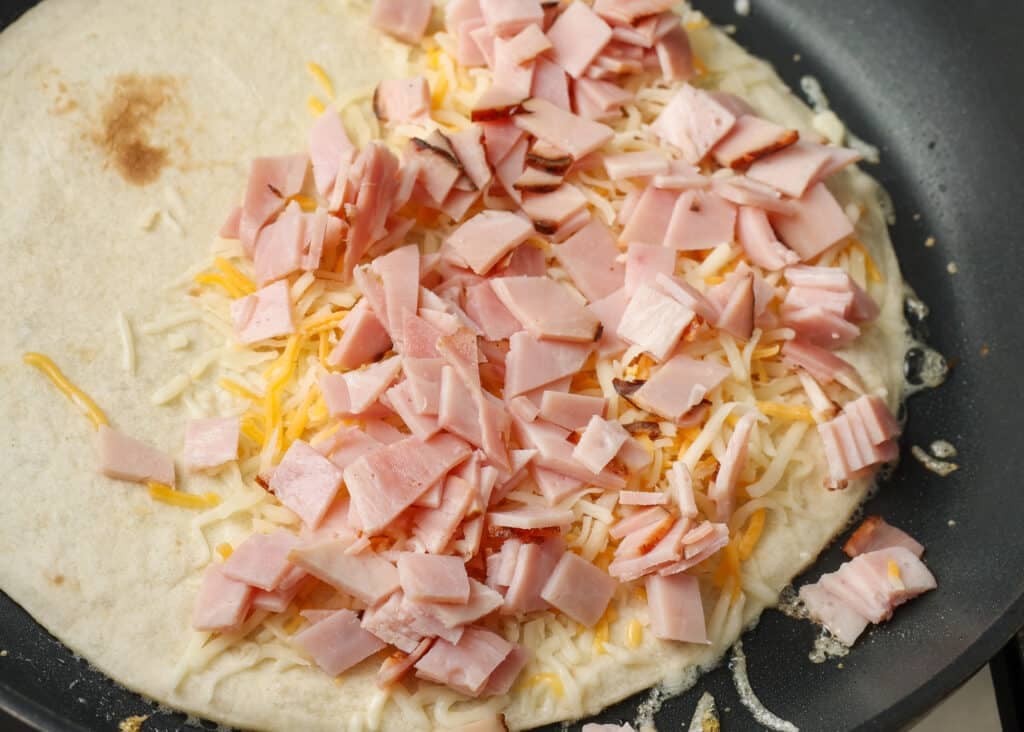
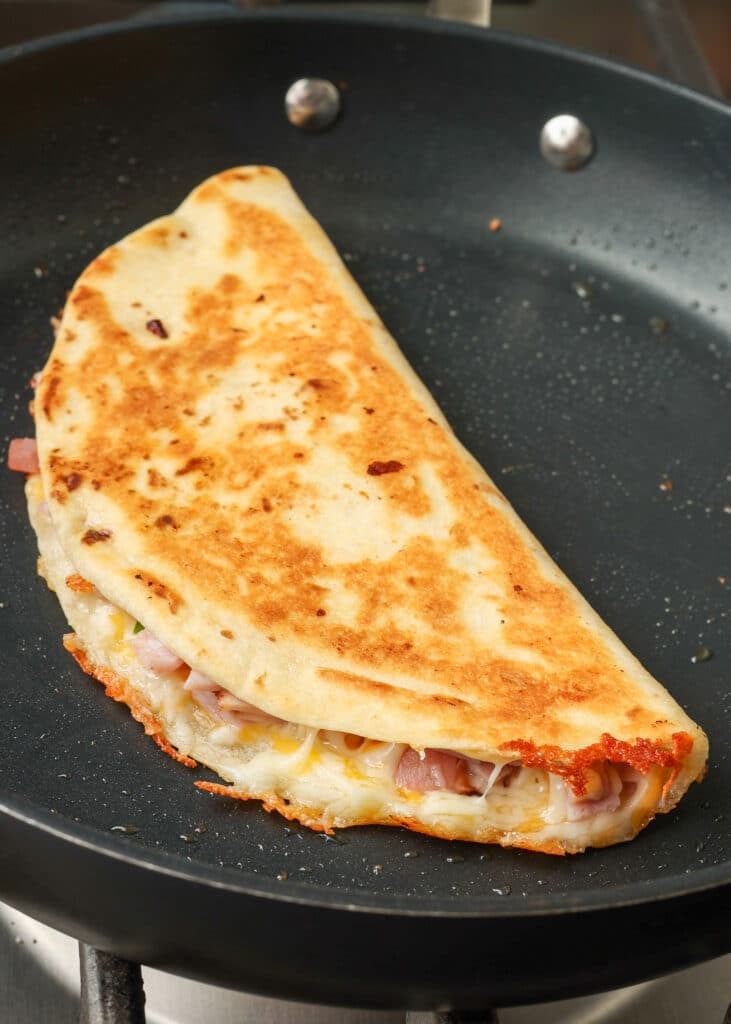
Buttering the Tortilla: While that heats up, I chop some the deli ham into small pieces. And, I give one side of my tortilla some love with the butter and a knife.
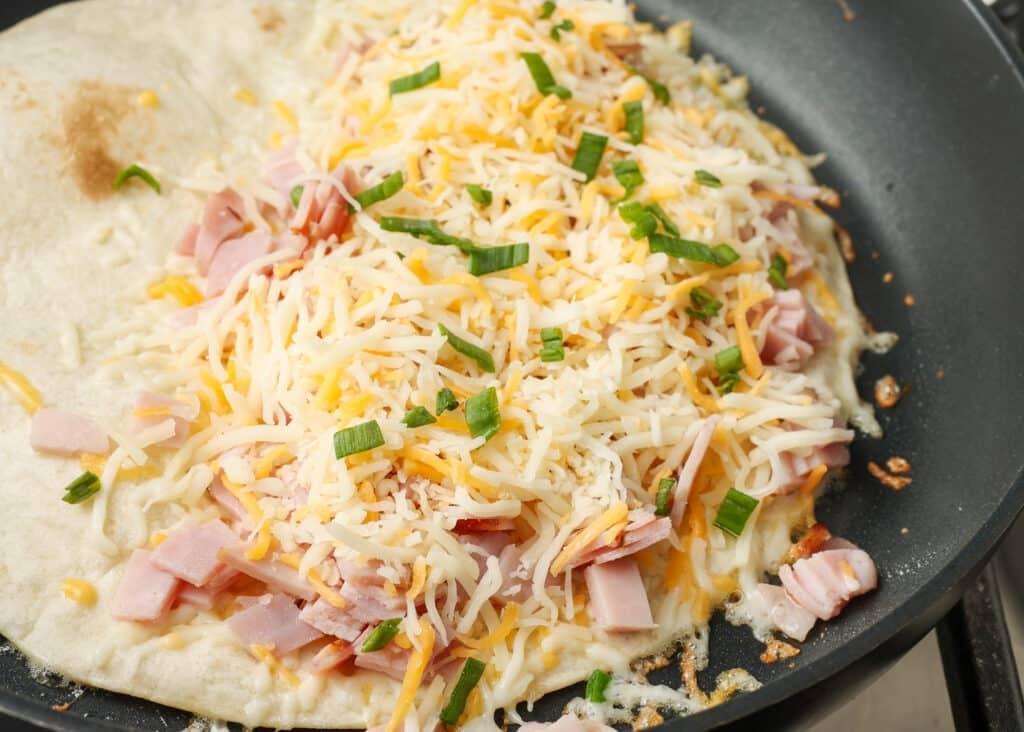
Assembling the Filling: I lay the buttered side of the tortilla onto the pan and sprinkle cheese over half of the top. Layer the ham on top of the cheese, then sprinkle with the remainder of the cheese.
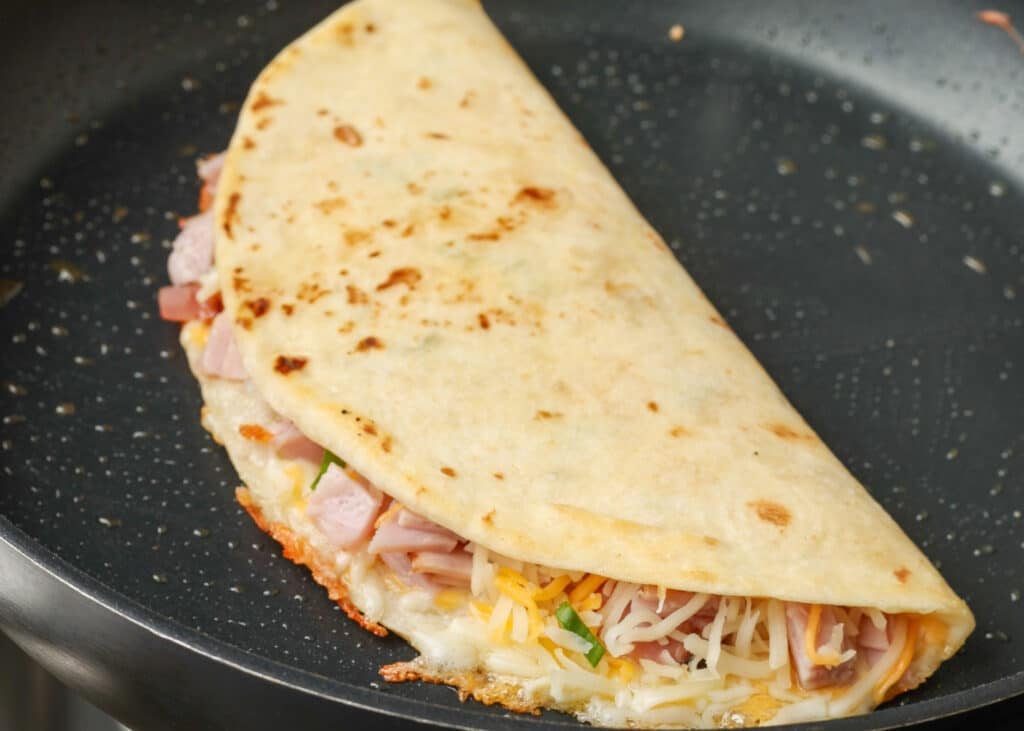
Cooking: Using the edge of a spatula, I carefully fold the uncovered half over the fillings. Then, I let it continue cooking for 1-2 minutes, until browned and crispy.
Flipping and Finishing: I carefully flip it over in the pan, and let the second side cook for 2-3 minutes, until crispy. The cheese should be fully melted by the time both sides finish cooking.
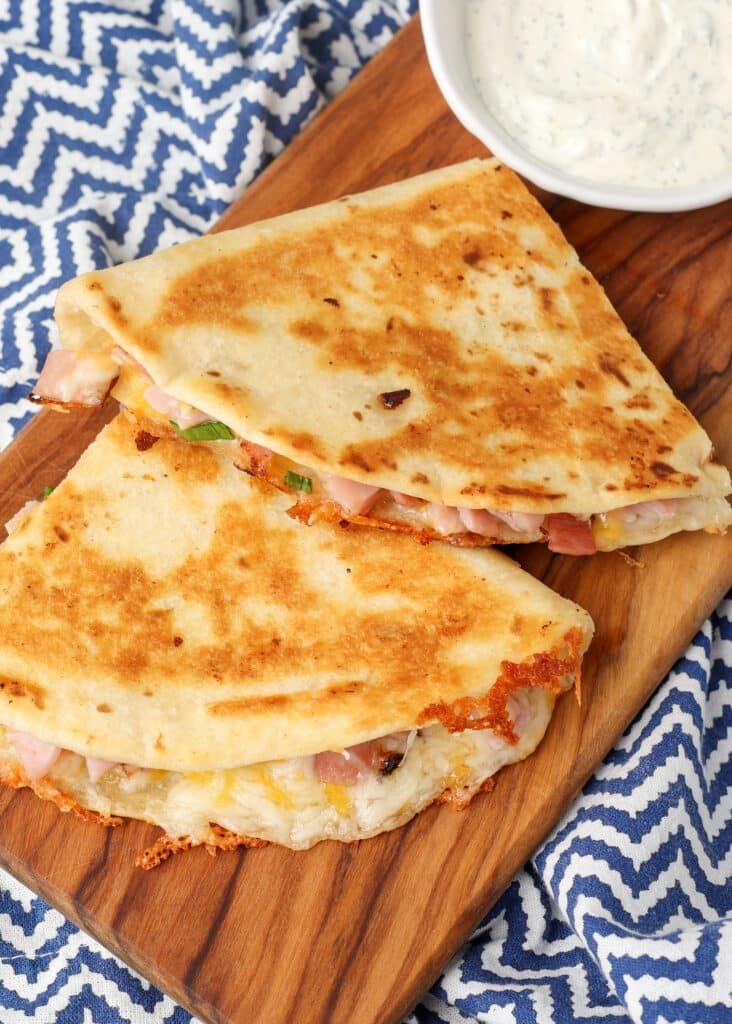
Slicing and Serving: Transfer the quesadilla to a cutting board, then slice it. You’ll want to eat this one before the cheese cools and sets.
You’ll find that “medium heat” means something different on every single stove. Gas ranges tend to run hotter and respond quickly to changes, while electric coils take longer to heat and cool. This is why I stress the importance of temperature control. You want it hot, so that you get a crispy brown exterior. But, too much heat will char the outside of the tortilla before the cheese has a chance to melt.
Manage the Heat – Remove the pan from the heat if the tortilla is getting too dark, too fast. You can also cover it with a lid to trap heat, or add a splash of water on the outside edge of the pan to create steam. Both will help the cheese melt faster.
Dry the Ham – This is usually not an issue with freshly sliced ham. But, some varieties of prepackaged ham contain a lot of extra moisture. So, patting the ham dry will help make sure you don’t end up with a soggy interior.
Shred Your Own – Pre-shredded cheese contains anti-caking agents that affect melt quality. But, freshly shredded cheese melts smoothly every time. I think you’ll find that it’s worth the extra effort. That said, if you choose to use pre-shredded cheese in your quesadilla, adding that tiny splash of water to the outside edge of the pan to create steam will guarantee a lovely melt, freshly-shredded cheese or not.
When I’m serving ham and cheese quesadillas, I almost always add something fresh and crisp on the side, like this bright cucumber tomato salad. This kind of easy contrast makes the meal feel more complete to me.
If I’m craving something slightly sweeter, I’ll set out a mandarin broccoli salad or sweet kale vegetable salad. Both bring texture, color, and a natural sweetness that plays so well with the salty ham and creamy cheese.
Make Ahead: Quesadillas really aren’t a “make ahead” option. But, you can totally pre-shred the cheese and chop the ham to use in advance.
How to Store: I just let the cooked quesadilla cool, then place it in an airtight container. It keeps well in the fridge for up to 3 days.
How to Reheat: If I’m in a hurry, I just pop any leftover triangles into the microwave for 15-30 seconds. But, to refresh that crispy texture, a few minutes in a skillet or air fryer does the trick.
Yes, but the texture will be firmer and more brittle. And, you’ll find that corn tortillas don’t fold as easily and can crack.
Yes. As long as the tortilla is fully coated with a light covering, it will brown evenly. But, if you miss any spots, they won’t crisp the same.
I like thin sliced ham, and I chop it so that it’s no larger than 1/2-inch squares. I find that makes it easier to evenly distribute it through the quesadilla. If you are using thick-sliced ham, dice it into 1/4-inch cubes for best results.

The post Ham and Cheese Quesadilla appeared first on Barefeet in the Kitchen.