Tuna Wrap

With my daughter just starting at her new school, mornings have gotten busier than ever! That’s why this easy Tuna Wrap recipe has been a lifesaver! It’s quick, tasty, and perfect for meal prep. I can make a batch ahead of time, store the wraps or the tuna salad separately, and lunches are ready to grab and go for a few days at a time. Fresh, satisfying, customizable, and most importantly, budget-friendly, these tuna salad wraps are a simple way to keep school lunches stress-free while still feeling homemade and wholesome!

A tuna wrap sliced in half on a plate.

Crunchy Tuna Salad Wraps

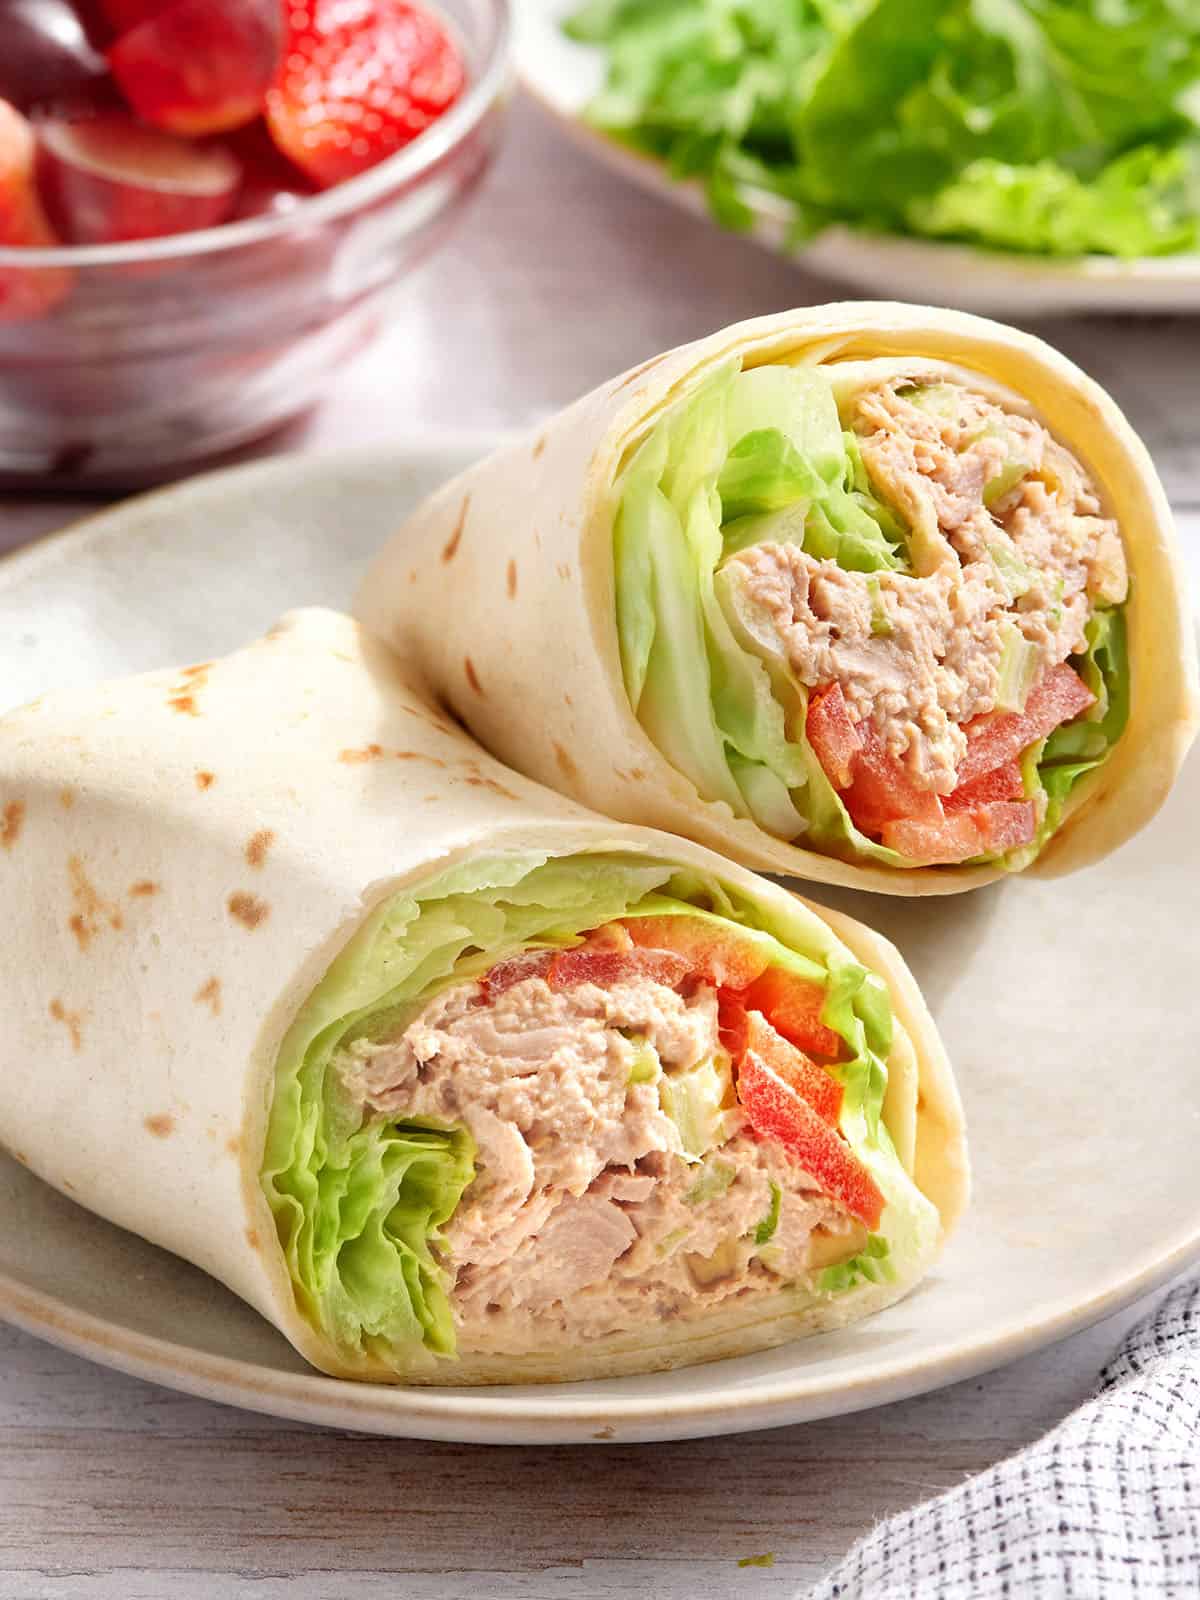
I used our classic tuna salad as the filling here, and it’s one of those simple, cheap mixes that still feels really satisfying thanks to all the crunch from the diced celery, chopped walnuts, and green onion (plus a little mayo and lemon to pull it all together). I also add a layer of romaine and tomato, which isn’t just there for added nutrients! The salad acts like a barrier, so the tortilla doesn’t soak up moisture too fast, which makes these wraps a much better option if you’re making them ahead. And honestly, these simple tuna wraps are such a nice change from the usual sandwich. They’re neat, lunchbox-friendly, healthy, and easy to switch up based on what you’ve got in (I’ve shared some variations to try below the step photos!)

Recipe Success Tips

  1. Save money with chunk light tuna. Chunk light tuna is usually the best deal, and it works perfectly here. The pieces are a bit smaller than albacore, but once they’re mixed with the mayo, lemon, and crunchy add-ins, it still tastes hearty and satisfying without bumping up the cost. However, solid albacore tuna will work if that’s what you’ve got.
  2. Heat the tortillas. Microwaving the wraps is a key part of this process, as it makes them more pliable and less likely to tear while rolling or open up after being rolled!
  3. Meal prep it. You can either make the wraps in advance or store the tortillas and the tuna salad separately to make them last longer in the fridge. Either way works!
A tuna wrap sliced in half on a plate.
Print Add to Collection Go to Collections

Tuna Wrap Recipe

This easy Tuna Wrap recipe is a quick, budget-friendly lunch with crunchy tuna salad, romaine, and tomato that's perfect for school lunches and meal prep.
Course Lunch, Sandwich
Cuisine American
Total Cost $5.78 recipe / $1.93 serving
Prep Time 10 minutes
Total Time 10 minutes
Servings 3 servings (1 wrap each)
Calories 412kcal
Author Jess Rice

Equipment

  • Mixing bowl

Ingredients

  • 12 oz. can chunk light tuna in water one can, $2.54
  • ½ cup celery diced (about 1 rib) $0.20
  • 2 Tbsp walnuts chopped, $0.75
  • 1 green onion sliced, $0.30
  • ¼ cup mayonnaise $0.30
  • ½ Tbsp lemon juice $0.04
  • tsp black pepper freshly cracked, $0.01
  • tsp salt $0.01
  • 1 Roma tomato sliced thin, $0.15
  • 6 romaine leaves torn into 3” pieces, $0.68
  • 3 extra-large flour tortillas burrito-size tortillas, $0.80

Instructions

  • Gather all the ingredients.
  • Drain the canned tuna well.
  • Finely dice the celery, chop the walnuts, and slice the green onions.
  • Combine the tuna, celery, walnuts, green onions, mayonnaise, lemon juice, pepper, and salt in a bowl. Stir to combine.
  • Tear the romaine into smaller pieces and thinly slice the roma tomato. I find thinner slices of tomato help the wraps stay together.
  • Microwave one extra-large tortilla at a time so they are still warm when you begin the wrap process. The warmth of the tortilla helps them stay tight and closed! I microwaved mine for 5-10 seconds each.
  • Start with a layer of romaine lettuce, then add 1/3 of the tomato slices on top fanned out. You’re making a little bed for the tuna salad that will help keep things from getting too messy or soggy. (I like to flatten the thick middle part of the romaine just a little bit before adding it to my wrap, if the romaine is really big and crunchy. It helps things roll a little easier.)
  • Add 1/3 of the tuna salad.
  • Begin rolling the wrap, using the lettuce underneath as a way to keep your fingers clean and get a tight wrap, pushing the filling towards you as you roll the tortilla away from you.
  • Fold in the sides as you go, creating a seal that keeps the tuna from falling out each end.
  • As you roll, continue to tuck the corners in while pulling the content of the wrap towards you gently to keep it tight.
  • Once rolled, let the wrap sit seam side down. The residual warmth from the wrap’s time in the microwave will help keep the seam sealed shut.

See how we calculate recipe costs here.

Nutrition

Serving: 1wrap | Calories: 412kcal | Carbohydrates: 20g | Protein: 34g | Fat: 22g | Sodium: 513mg | Fiber: 3g

how to make A Tuna Wrap step-by-step photos

The ingredients to make tuna wrap.

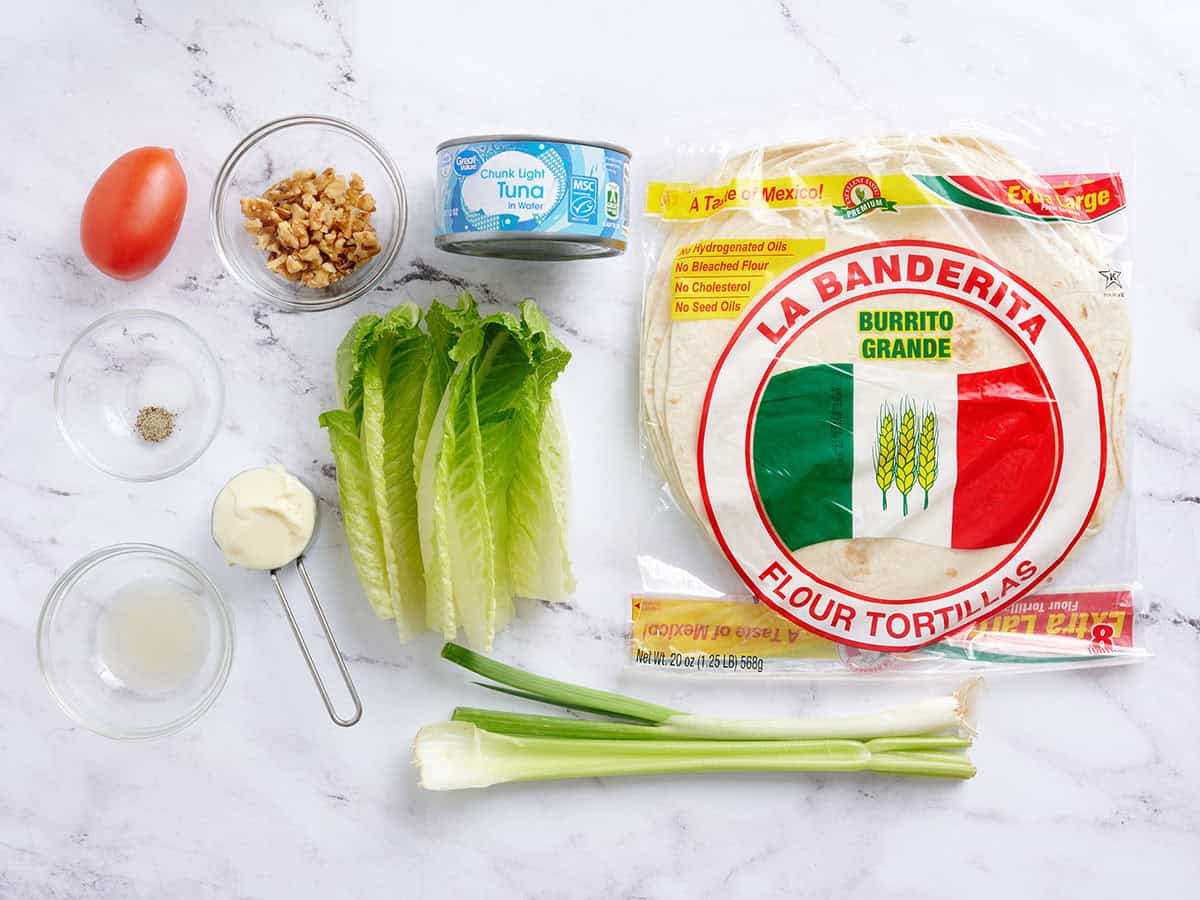
Gather all of your ingredients.

Drained canned tuna in a bowl.

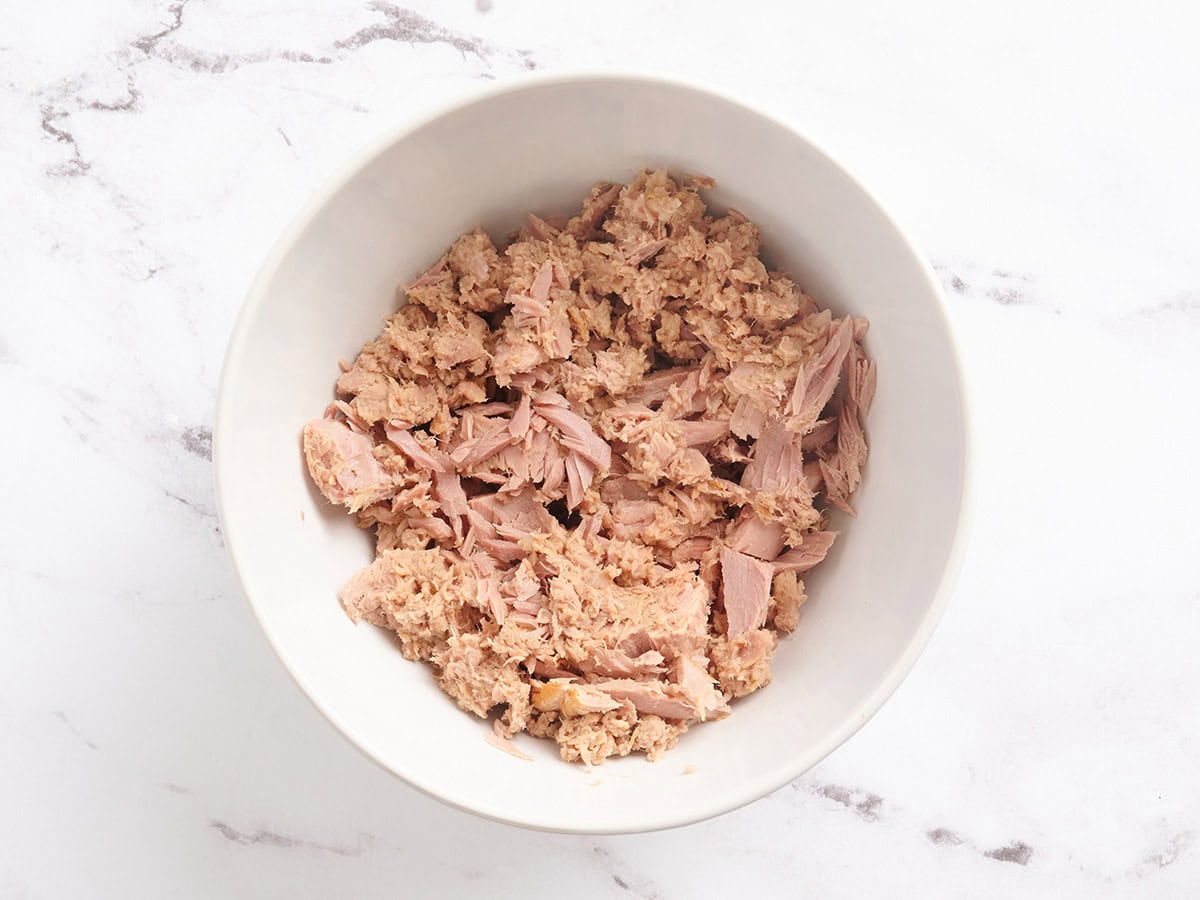
Drain the tuna: Strain one (12 oz.) can chunk light tuna really well (the drier it is, the better the wrap holds together).

Diced green onions, chopped walnuts, and diced celery on a wooden cutting board.

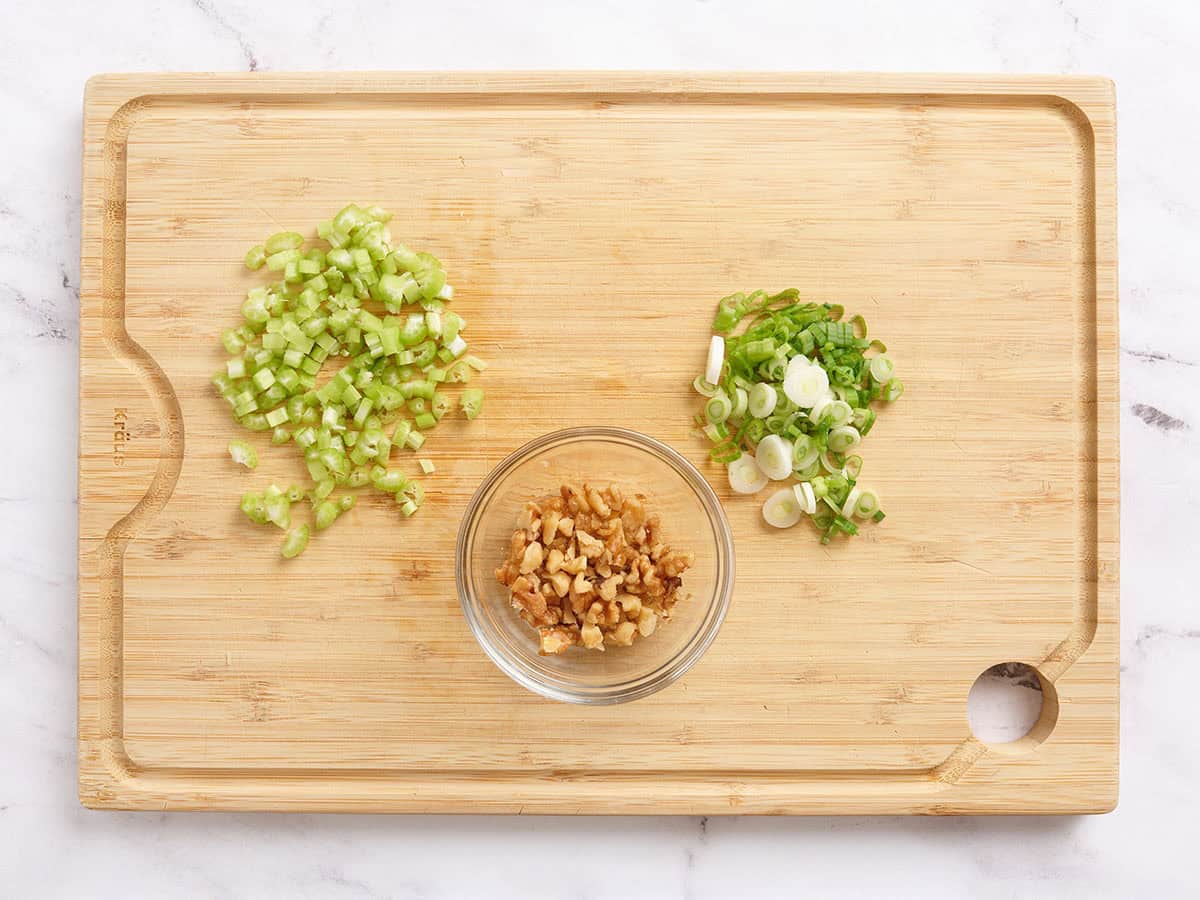
Prep your mix-ins: Dice ½ cup celery (about 1 rib), chop 2 Tbsp walnuts, and slice 1 green onion.

Diced celery, green onions, canned tuna, walnuts, seasonings and mayo in a bowl.

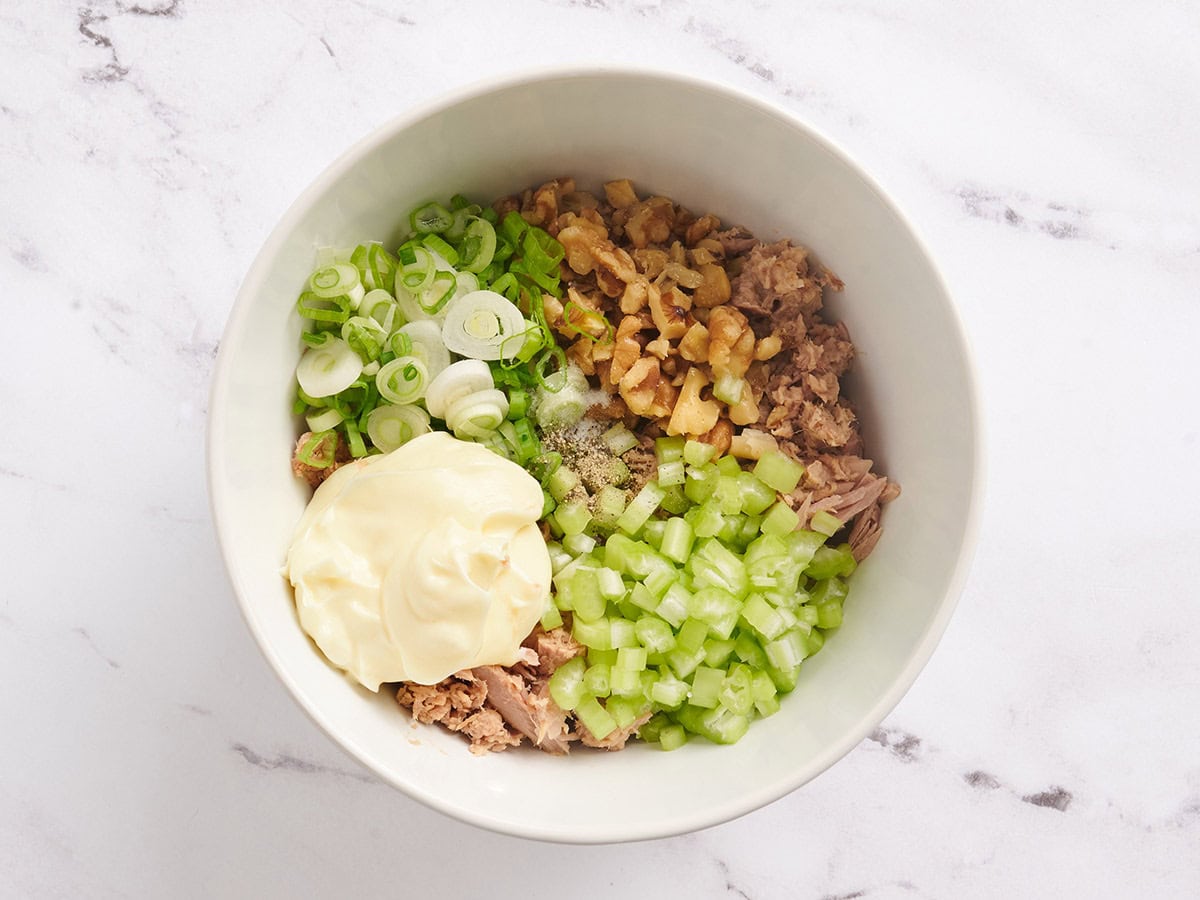
Make the tuna filling: In a bowl, add the drained tuna, ½ cup diced celery, 2 Tbsp chopped walnuts, 1 sliced green onion, ¼ cup mayonnaise, ½ Tbsp lemon juice, ⅛ tsp black pepper, and ⅛ tsp salt.

Tuna salad in a mixing bowl.

Stir until evenly combined.

Sliced lettuce and tomatoes on a wooden cutting board.

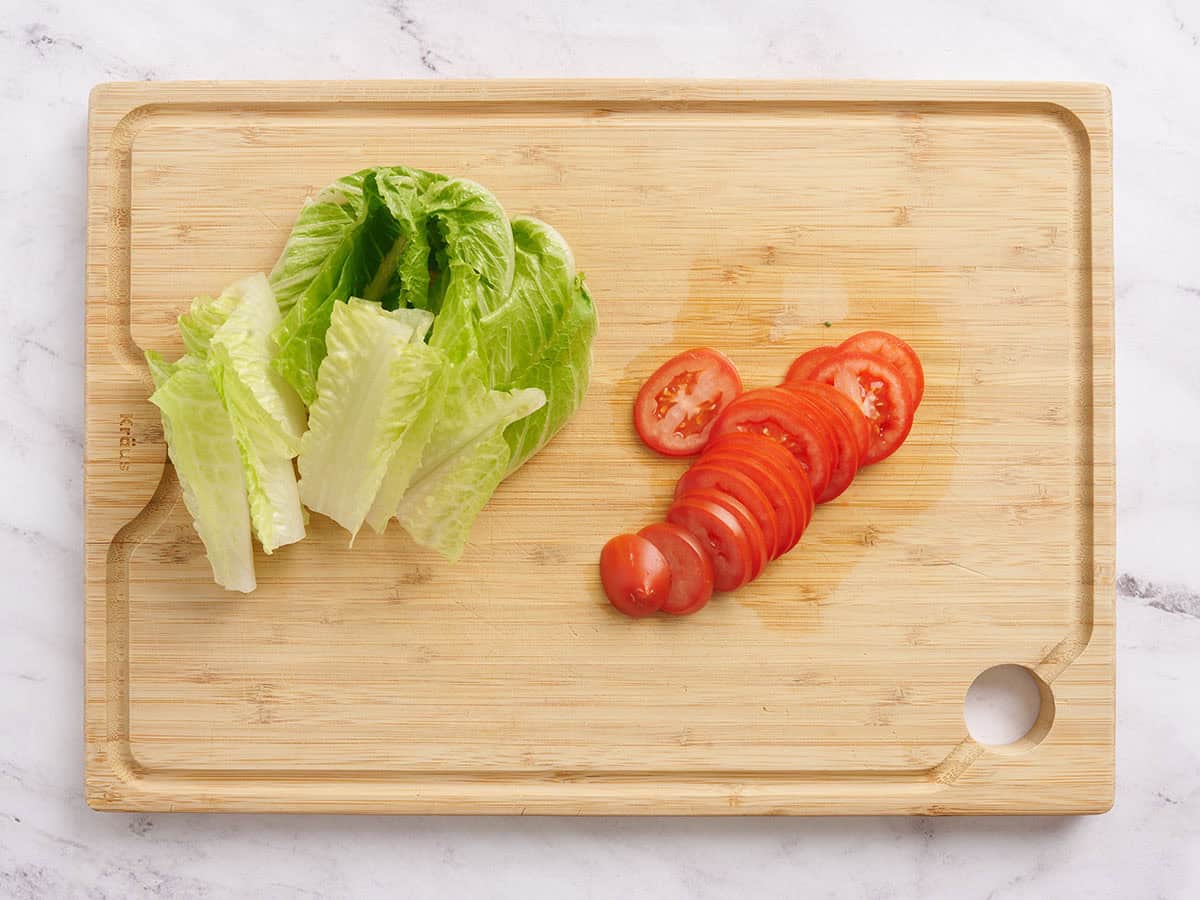
Prep the salad: Tear 6 romaine leaves into smaller pieces and thinly slice 1 Roma tomato. I prefer thinner slices of tomato as they help the wraps stay together.

A wrap on a plate.

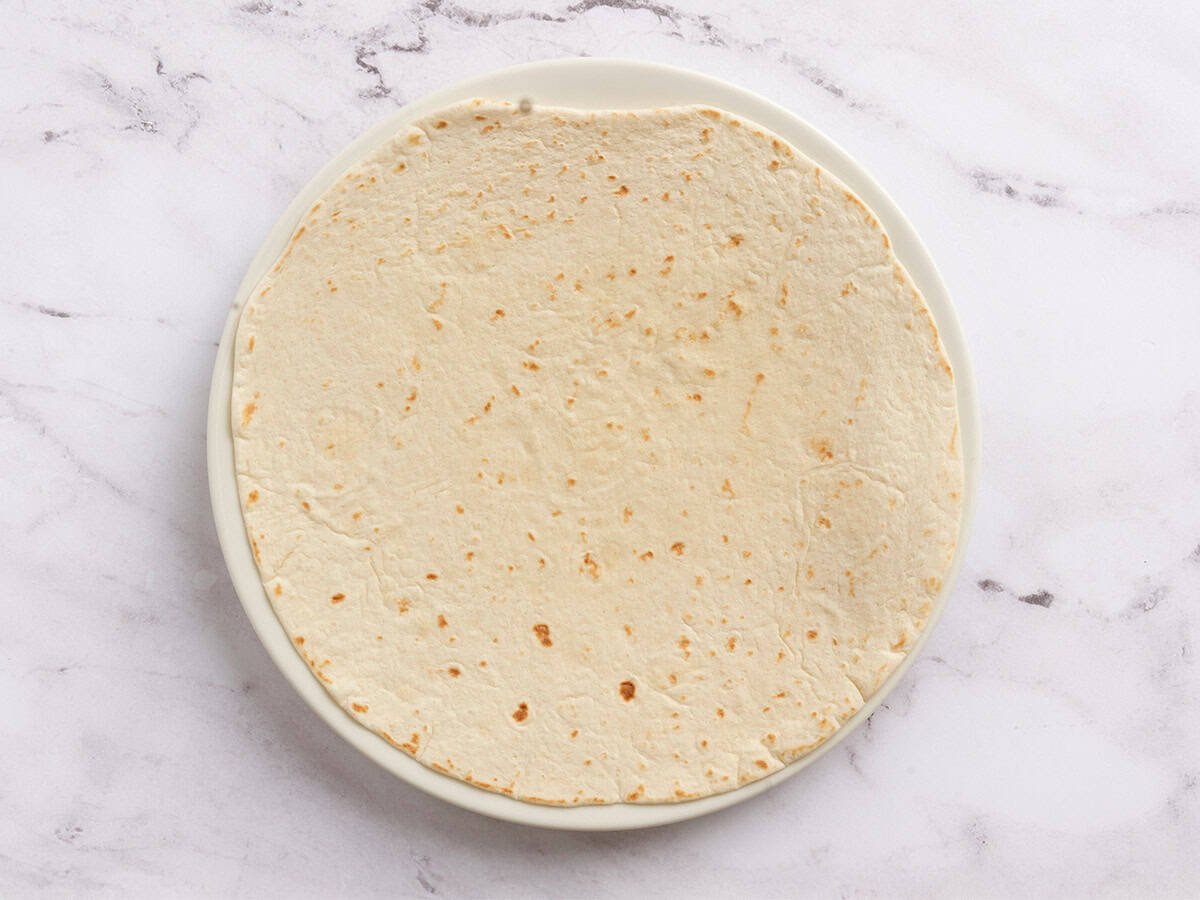
Warm the tortillas: Microwave 1 extra-large tortilla at a time for 5-10 seconds, just until soft and warm, and then start assembling right away (warm tortillas roll tighter/are less likely to tear and stay closed better).

A hand straightening a piece of lettuce before putting it on a wrap.

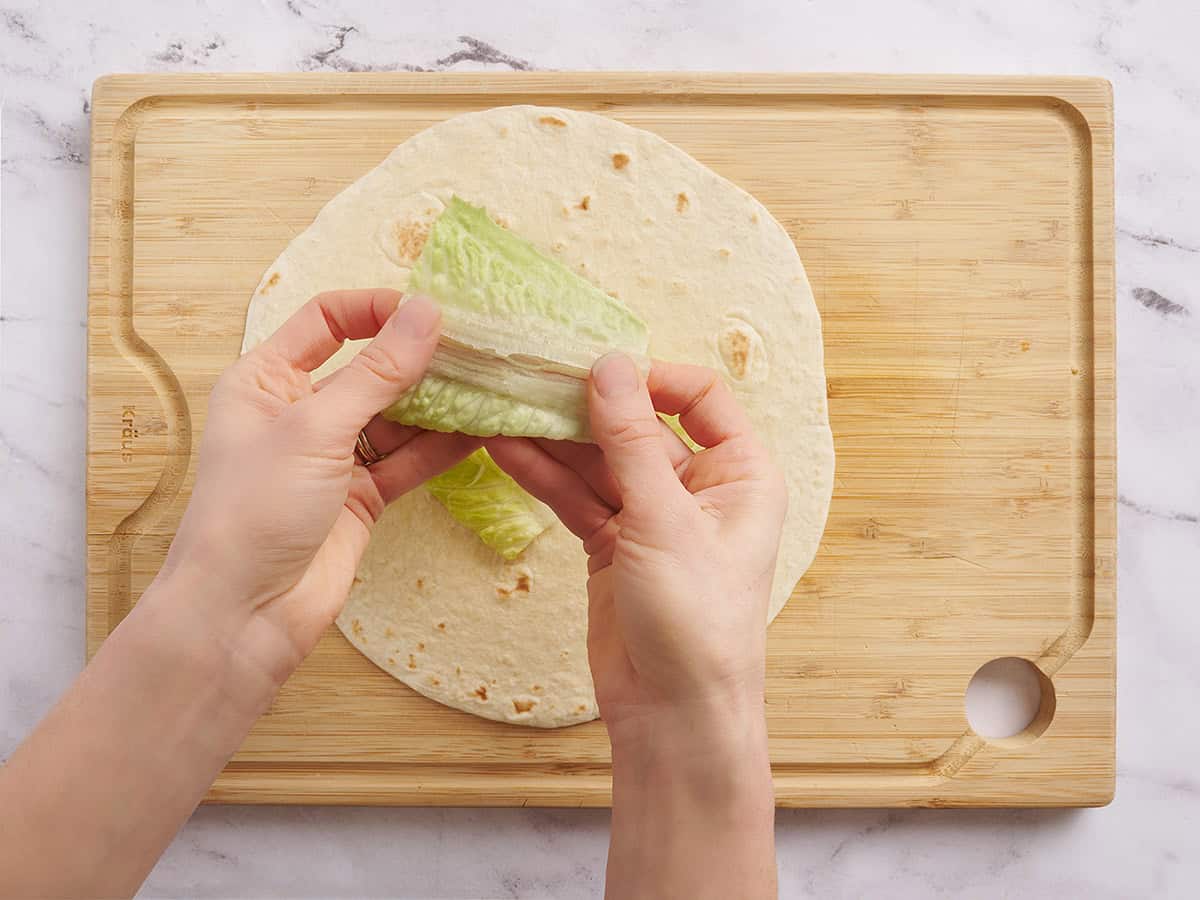
Assemble the wraps: Add a layer of romaine lettuce leaves to your warmed wrap. If your romaine leaves have a really thick, crunchy rib, gently press/flatten that thick middle section before adding it to the wrap so it rolls more easily.

A collage of a tuna wrap being filled.

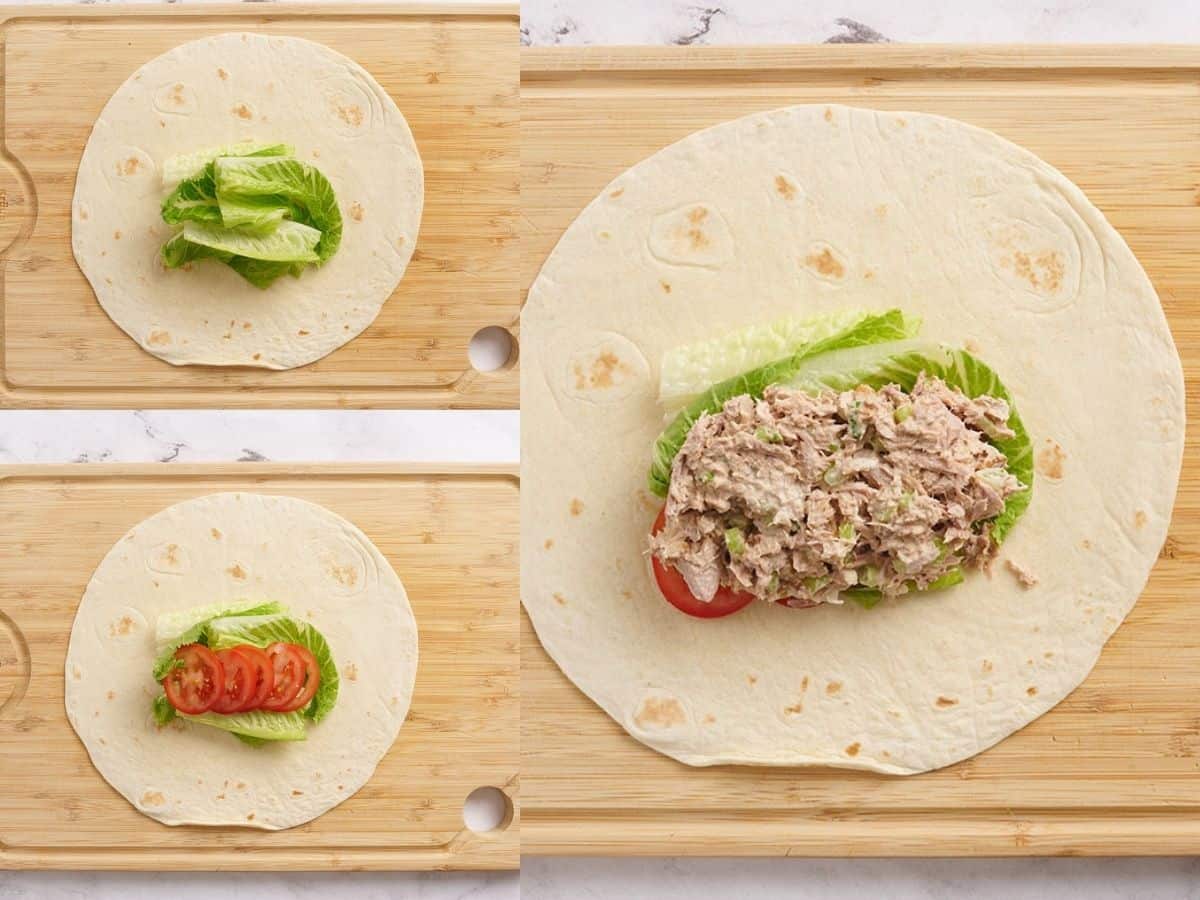
Once you’ve placed the romaine lettuce, add 1/3 of the tomato slices on top, fanned out. You’re making a little bed for the tuna salad that will help keep things from getting too messy or soggy. Now add 1/3 of the tuna mix on top.

A collage of hands rolling a tuna wrap.

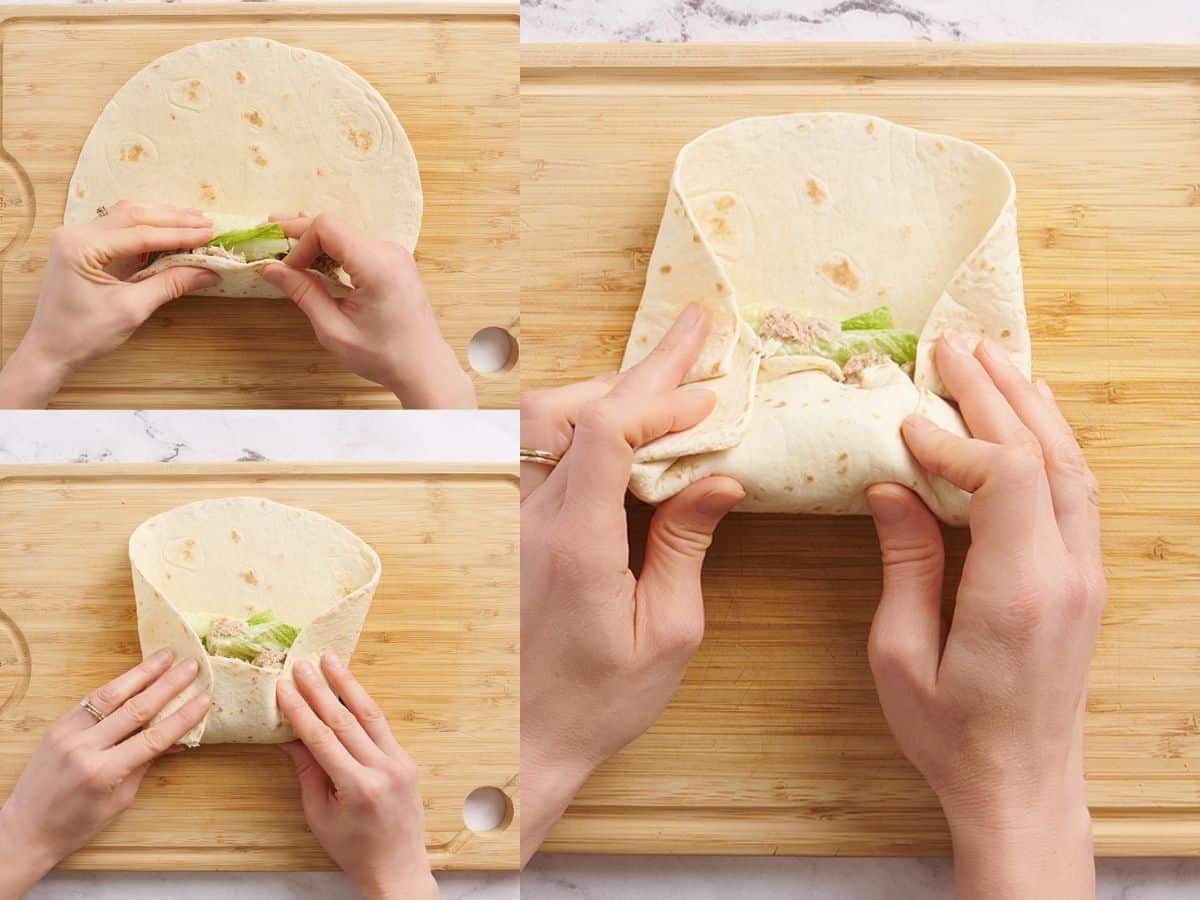
Roll the wrap: Begin rolling the wrap, using the lettuce underneath as a way to keep your fingers clean and get a tight wrap. Keep pushing the filling towards you as you roll the tortilla away from you.

As you roll, fold in the sides to create a seal so the filling doesn’t spill out the ends. Keep tucking in the corners and gently pulling the filling back toward you as you roll to keep the wrap snug.

A rolled tuna wrap on a wooden cutting board.

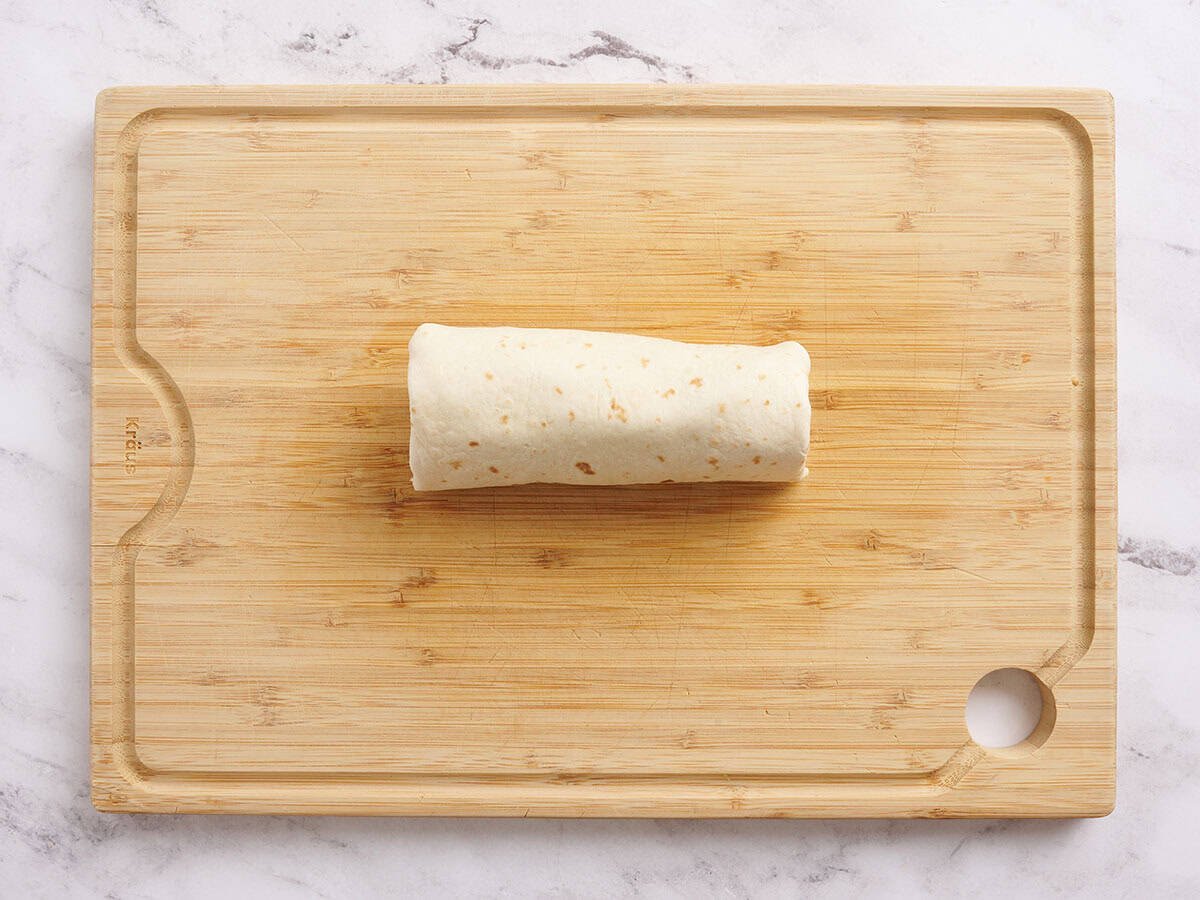
Place the wrap seam-side down for a minute. The leftover warmth from microwaving helps the seam stick and stay closed.

Three rolled tuna wraps on a wooden cutting board.

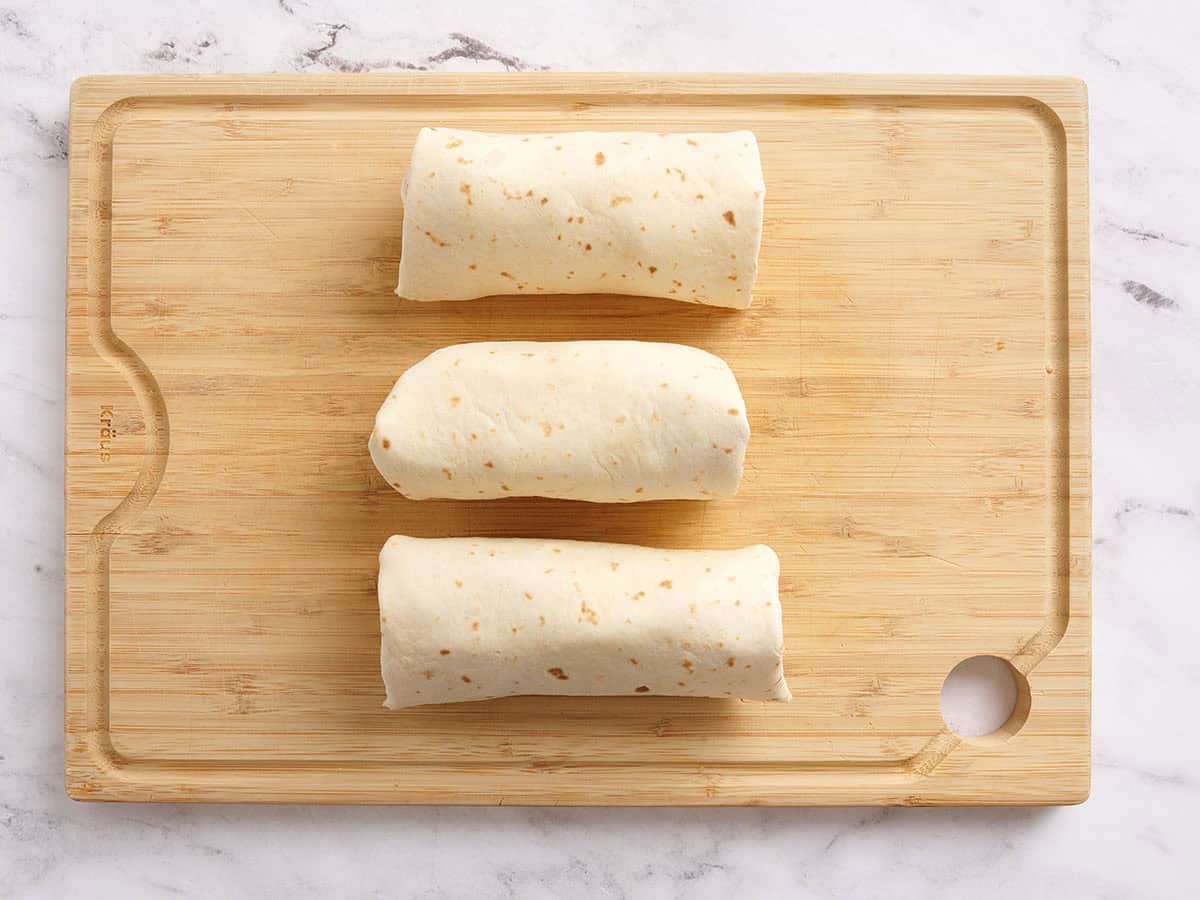
Finish: Now repeat the filling and rolling process with the remaining 2 wraps. Serve (or store in the fridge for later!) and enjoy!

Overhead view of tuna wrap in a meal prep box with strawberries, grapes and white bean salad.

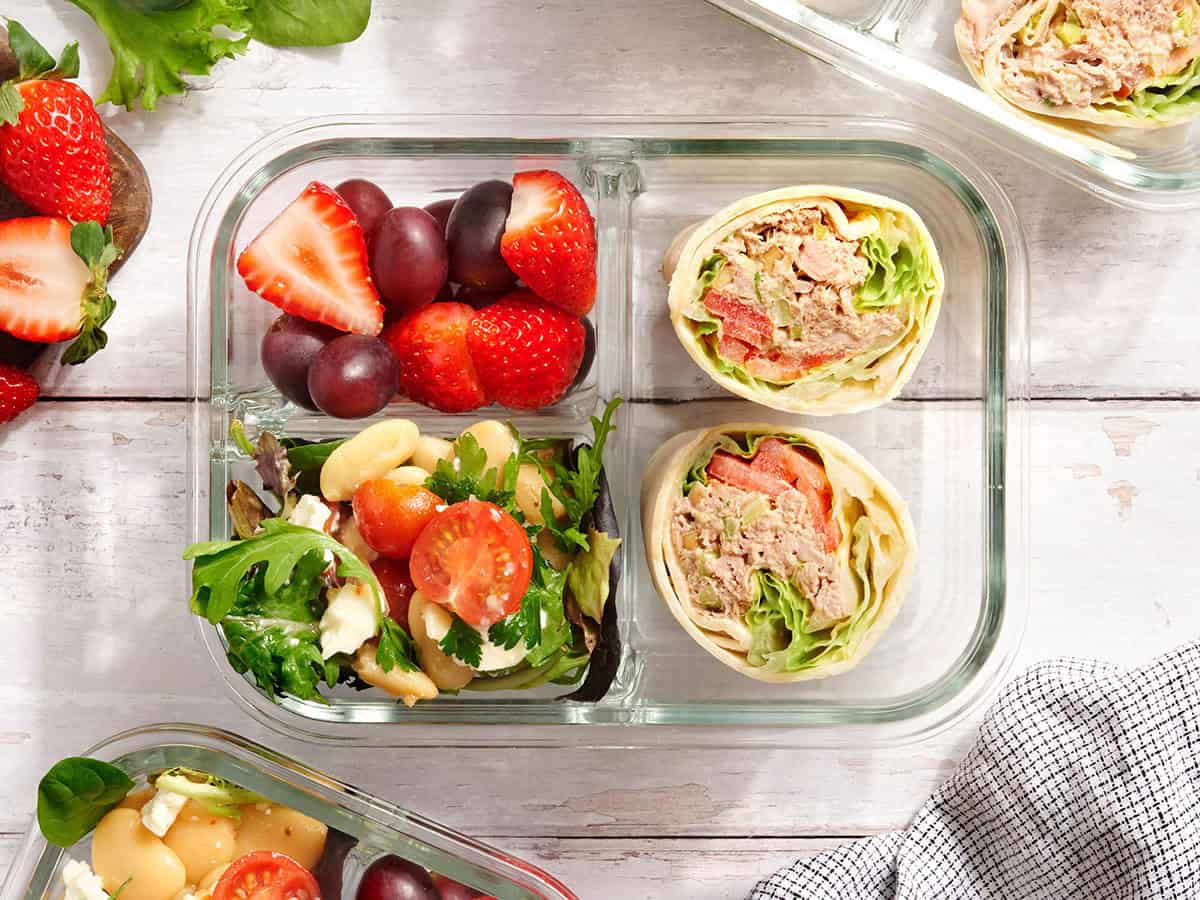
Seen here with strawberries, grapes, and our Mediterranean white bean salad.

Tuna Wrap Variations

If you’re wondering what else you can put in a tuna wrap, here are some easy add-ins and swaps that change the flavor profile without making things complicated!

  • Swap the mayo for a sesame oil and soy sauce mix to make a sesame tuna salad
  • Mix in diced avocado
  • Add diced bell peppers for more crunch and color
  • Stir in canned sweetcorn
  • Stir in gochujang to give your tuna salad a little kick, like our gochujang tuna salad
  • Swap the walnuts for sunflower seeds, pepitas, or sliced almonds for a different kind of crunch
  • Stir in chopped pickles or a spoonful of relish
  • For a Mediterranean tuna salad-inspired wrap, toss the tuna with a simple vinaigrette and add white beans
  • Add chopped cucumber with (or instead of) the tomatoes
  • Add sliced or shredded cheese, then toast the wrap in a skillet to turn it into a tuna melt wrap

Serving Suggestions

I packed these canned tuna wraps into a simple lunchbox with fruit and a Mediterranean-style bean salad on the side, and it made the whole meal feel more complete. If you want more make-ahead sides that still feel fresh, my cauliflower tabbouleh or our lentil and cranberry salad are both great options! You can also round it out with veggie sticks and hummus, a little yogurt, potato chips, pickles, or olives for something briny, or a small handful of nuts to keep it extra filling.

Storage Instructions

The tuna salad on its own keeps well in an airtight container in the fridge for up to 4 days. However, if you assemble these tuna wraps ahead of time, I recommend eating them within 3 days so the tortilla stays as fresh as possible and the sliced tomatoes don’t get watery or make things soggy.

More Wrap Recipes

  • Cottage Cheese Wraps: These budget-friendly wraps are my go-to high-protein, low-carb option, packing 18g of protein each while staying gluten-free, flavorful, and perfect for any filling.
  • Chickpea Salad Wraps: These creamy, spicy Sriracha chickpea wraps are a quick, customizable vegetarian lunch that’s perfect for easy, make-ahead meals.
  • Greek Chicken Wraps: Having these wrap components prepped in the fridge gives you flexible, build-as-you-go meals for days.

The post Tuna Wrap appeared first on Budget Bytes.